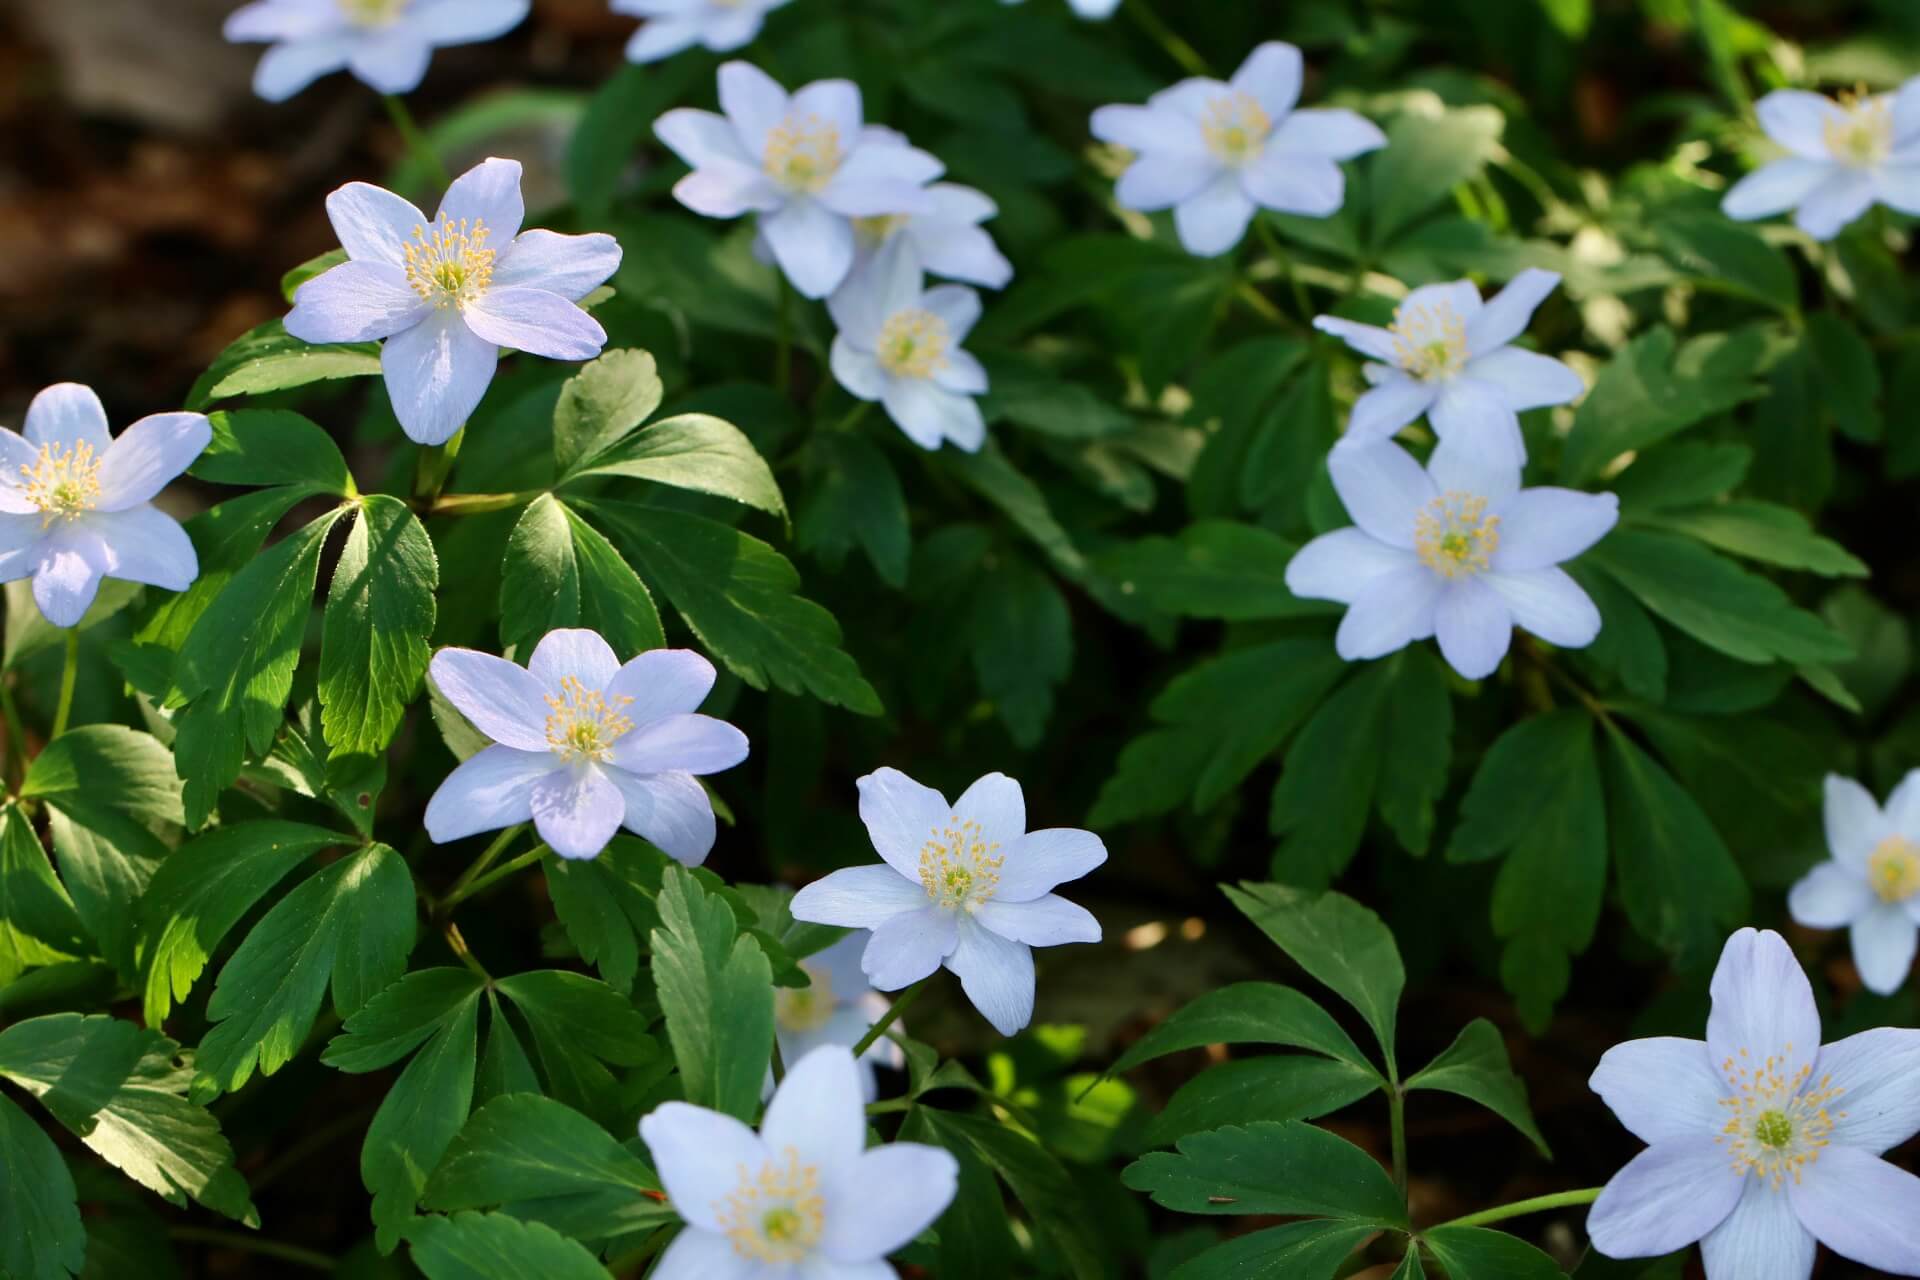
Wood Anemones light up the floor of deciduous woodlands in March and April with starry constellations of pure white or pink tinged blooms. The flowers are lifted above a shaggy carpet of lush green leaves, an emerald sky to the white star flowers.
This is not a flower I was familiar with in childhood and there are none in the woodlands near where I currently live. Travelling by car in a lane in West Berkshire last spring, I spotted a huge clump of them by the roadside, and immediately fell in love.
I was keen to try and get a patch going in my garden and this article describes how I went about it.
Sadly, I didn’t have my camera with me when I saw the roadside clump but if you want to know what they look like in a woodland setting, there are many beautiful images online. Follow the link here to the pages of the Woodland Trust, which contains some lovely photographs of this stunning woodland flower.
Where do wood anemones grow in the wild?
Wood Anemones are part of the ranunculus or buttercup family. Their latin name is Amemone nemorosa but have the endearing common names of Windflower and Ladies nightcap. Whilst in the same family, they are different from Anemone Blanda, which has more daisy-like, starry flowers in blue, white and pink.
Native to most parts of Northern Europe, the Wood Anemone grows under the canopy of deciduous woodland, where sunlight can permeate the bare branches and allow the flowers to open. They stubbornly refuse to open on dull or rainy days.
Large expanses of Wood Anemones can indicate an ancient woodland. Unlike bluebells and many other woodland flowers, they do not spread by seed, colonising slowly instead by extending their wormlike brown rhizomes through the leaf littered soil of the forest floor. A strong colony is therefore an indication of perfect conditions and years of slow but steady expansion.
Anemone nemorosa is the common wild species but in her book ‘Bulb’, Anna Pavord lists hybrids such as the pale yellow Anemone x lipsiensis ‘Pallida’ and a lavender coloured variety called ‘Allenii’.
Where to grow wood anemones
If you like the look of Wood Anemones, don’t be put off if you have a small garden or lack a woodland setting. Wood Anemones are surprisingly versatile in the garden. They will grow at any aspect and can tolerate sun or partial shade.
They do require moist soil, so any site which dries out in summer is unlikely to be suitable. The display should get better and better every year so it’s best to choose a site where the rhizomes can be left undisturbed to do their thing.
Sarah Raven flowers suggest planting them at the front of borders. I can imagine them adding a lacy frill to your floral displays if used in this way, but not if you change your displays regularly or could damage the rhizomes with your trowel whilst weeding.
J Parkers recommends them as rockery plants or even in patio pots.
My chosen site
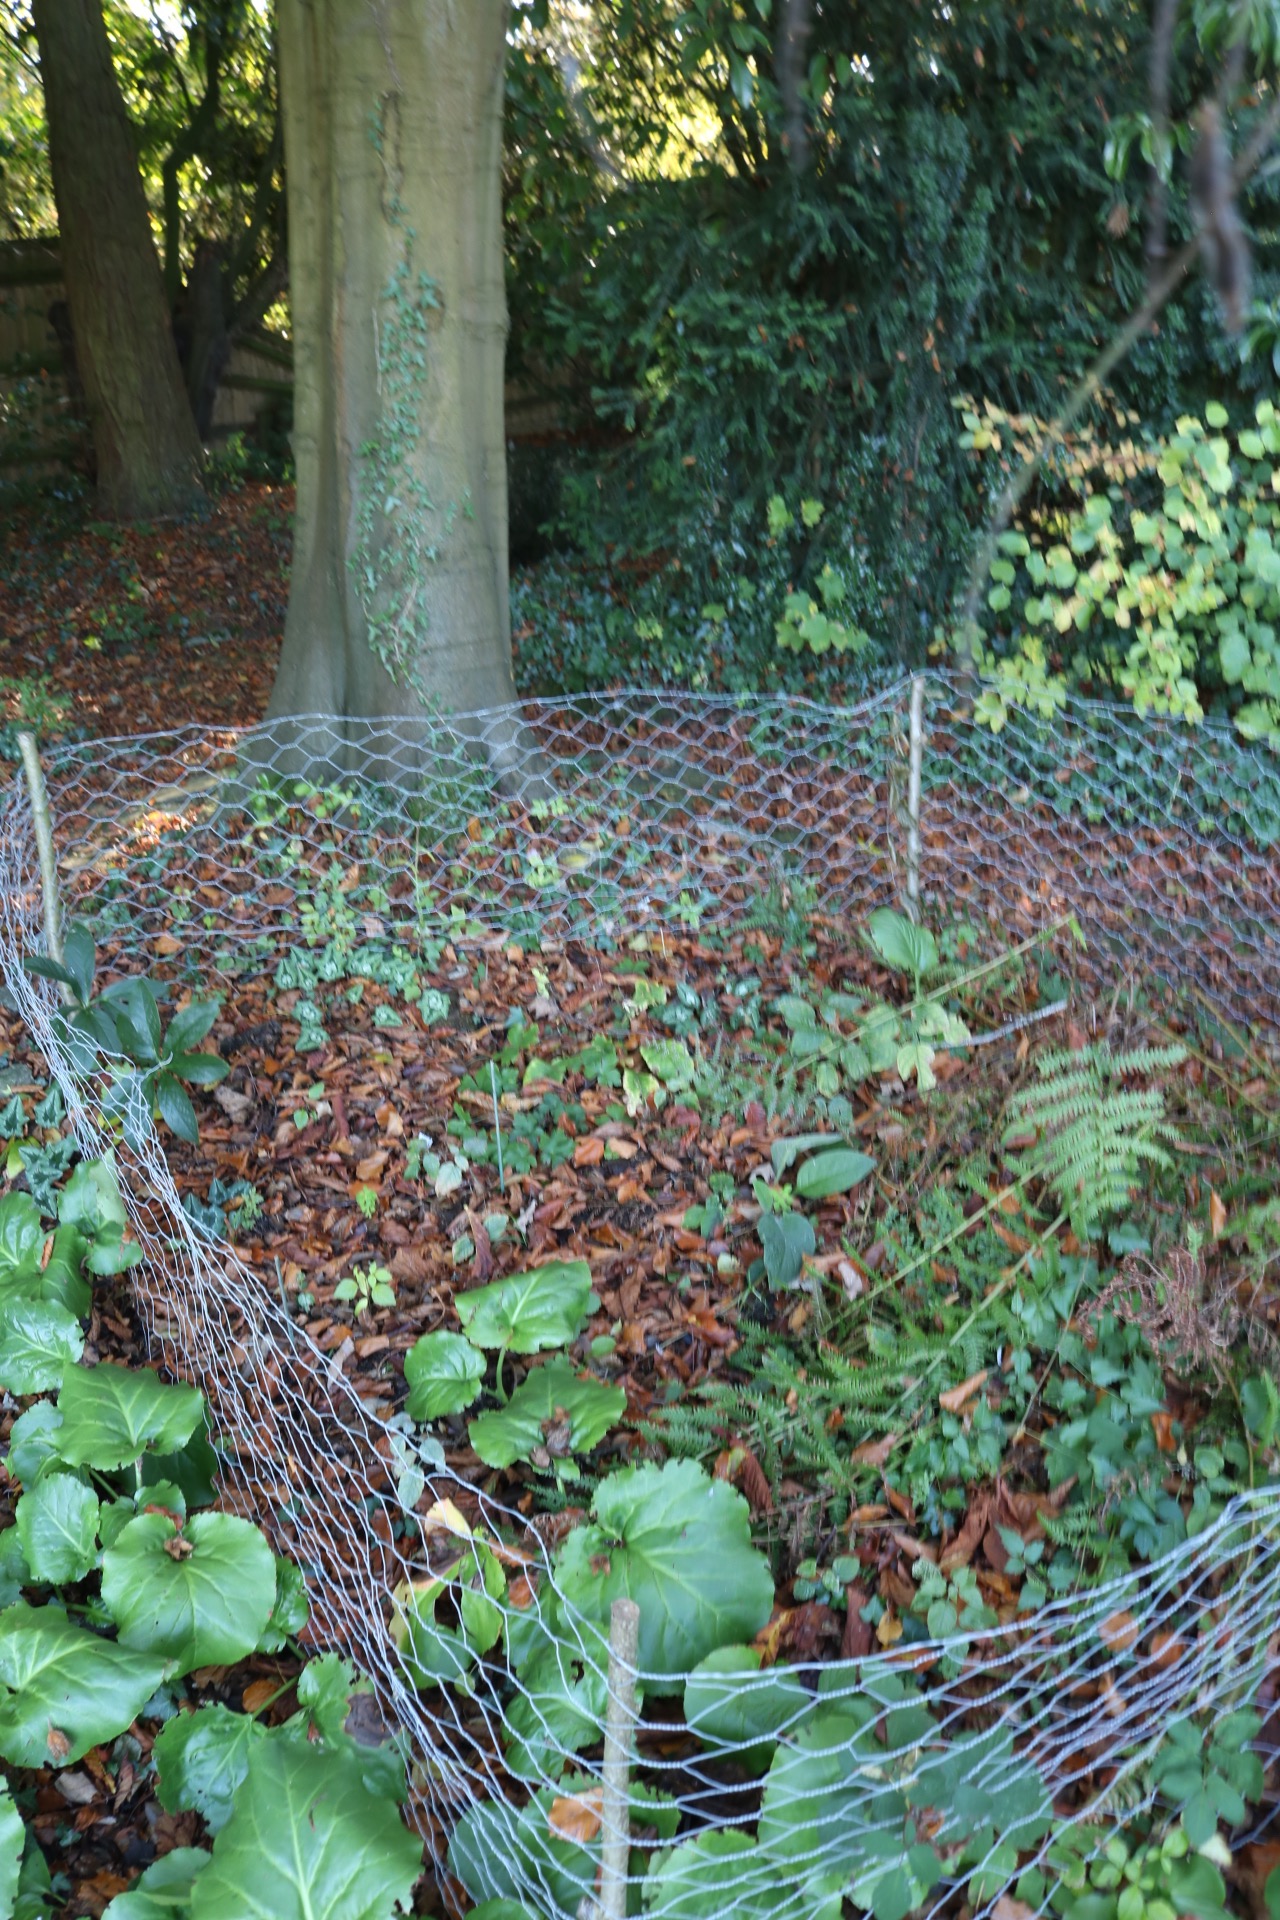
Whilst I liked the idea of growing some in pots, the thought of establishing a small colony to replicate a woodland scene was too tempting. I remembered an unpromising site at the base of a large copper beech tree at the far end of my garden. The canopy provides shade in summer but will not be in leaf at flowering time, hopefully allowing the flowers to open on sunny days.
Nothing much was growing in this area apart from a hellebore, a few Elephant’s Ears (Bergenia), ferns, ivy and some self-seeded baby hollies and elders. A few Cyclamen hederifolium had also spread here from a neighbouring patch.
Planting options
Wood anemones are available from some suppliers actively growing in spring, or as dormant rhizomes in autumn. A third option is described in Anna Pavord’s book ‘Bulb’ – to plant them in autumn, freshly lifted at source and damp packed. An admittedly quick online search revealed no obvious suppliers of these, but it may be possible to find local suppliers for those in the know.
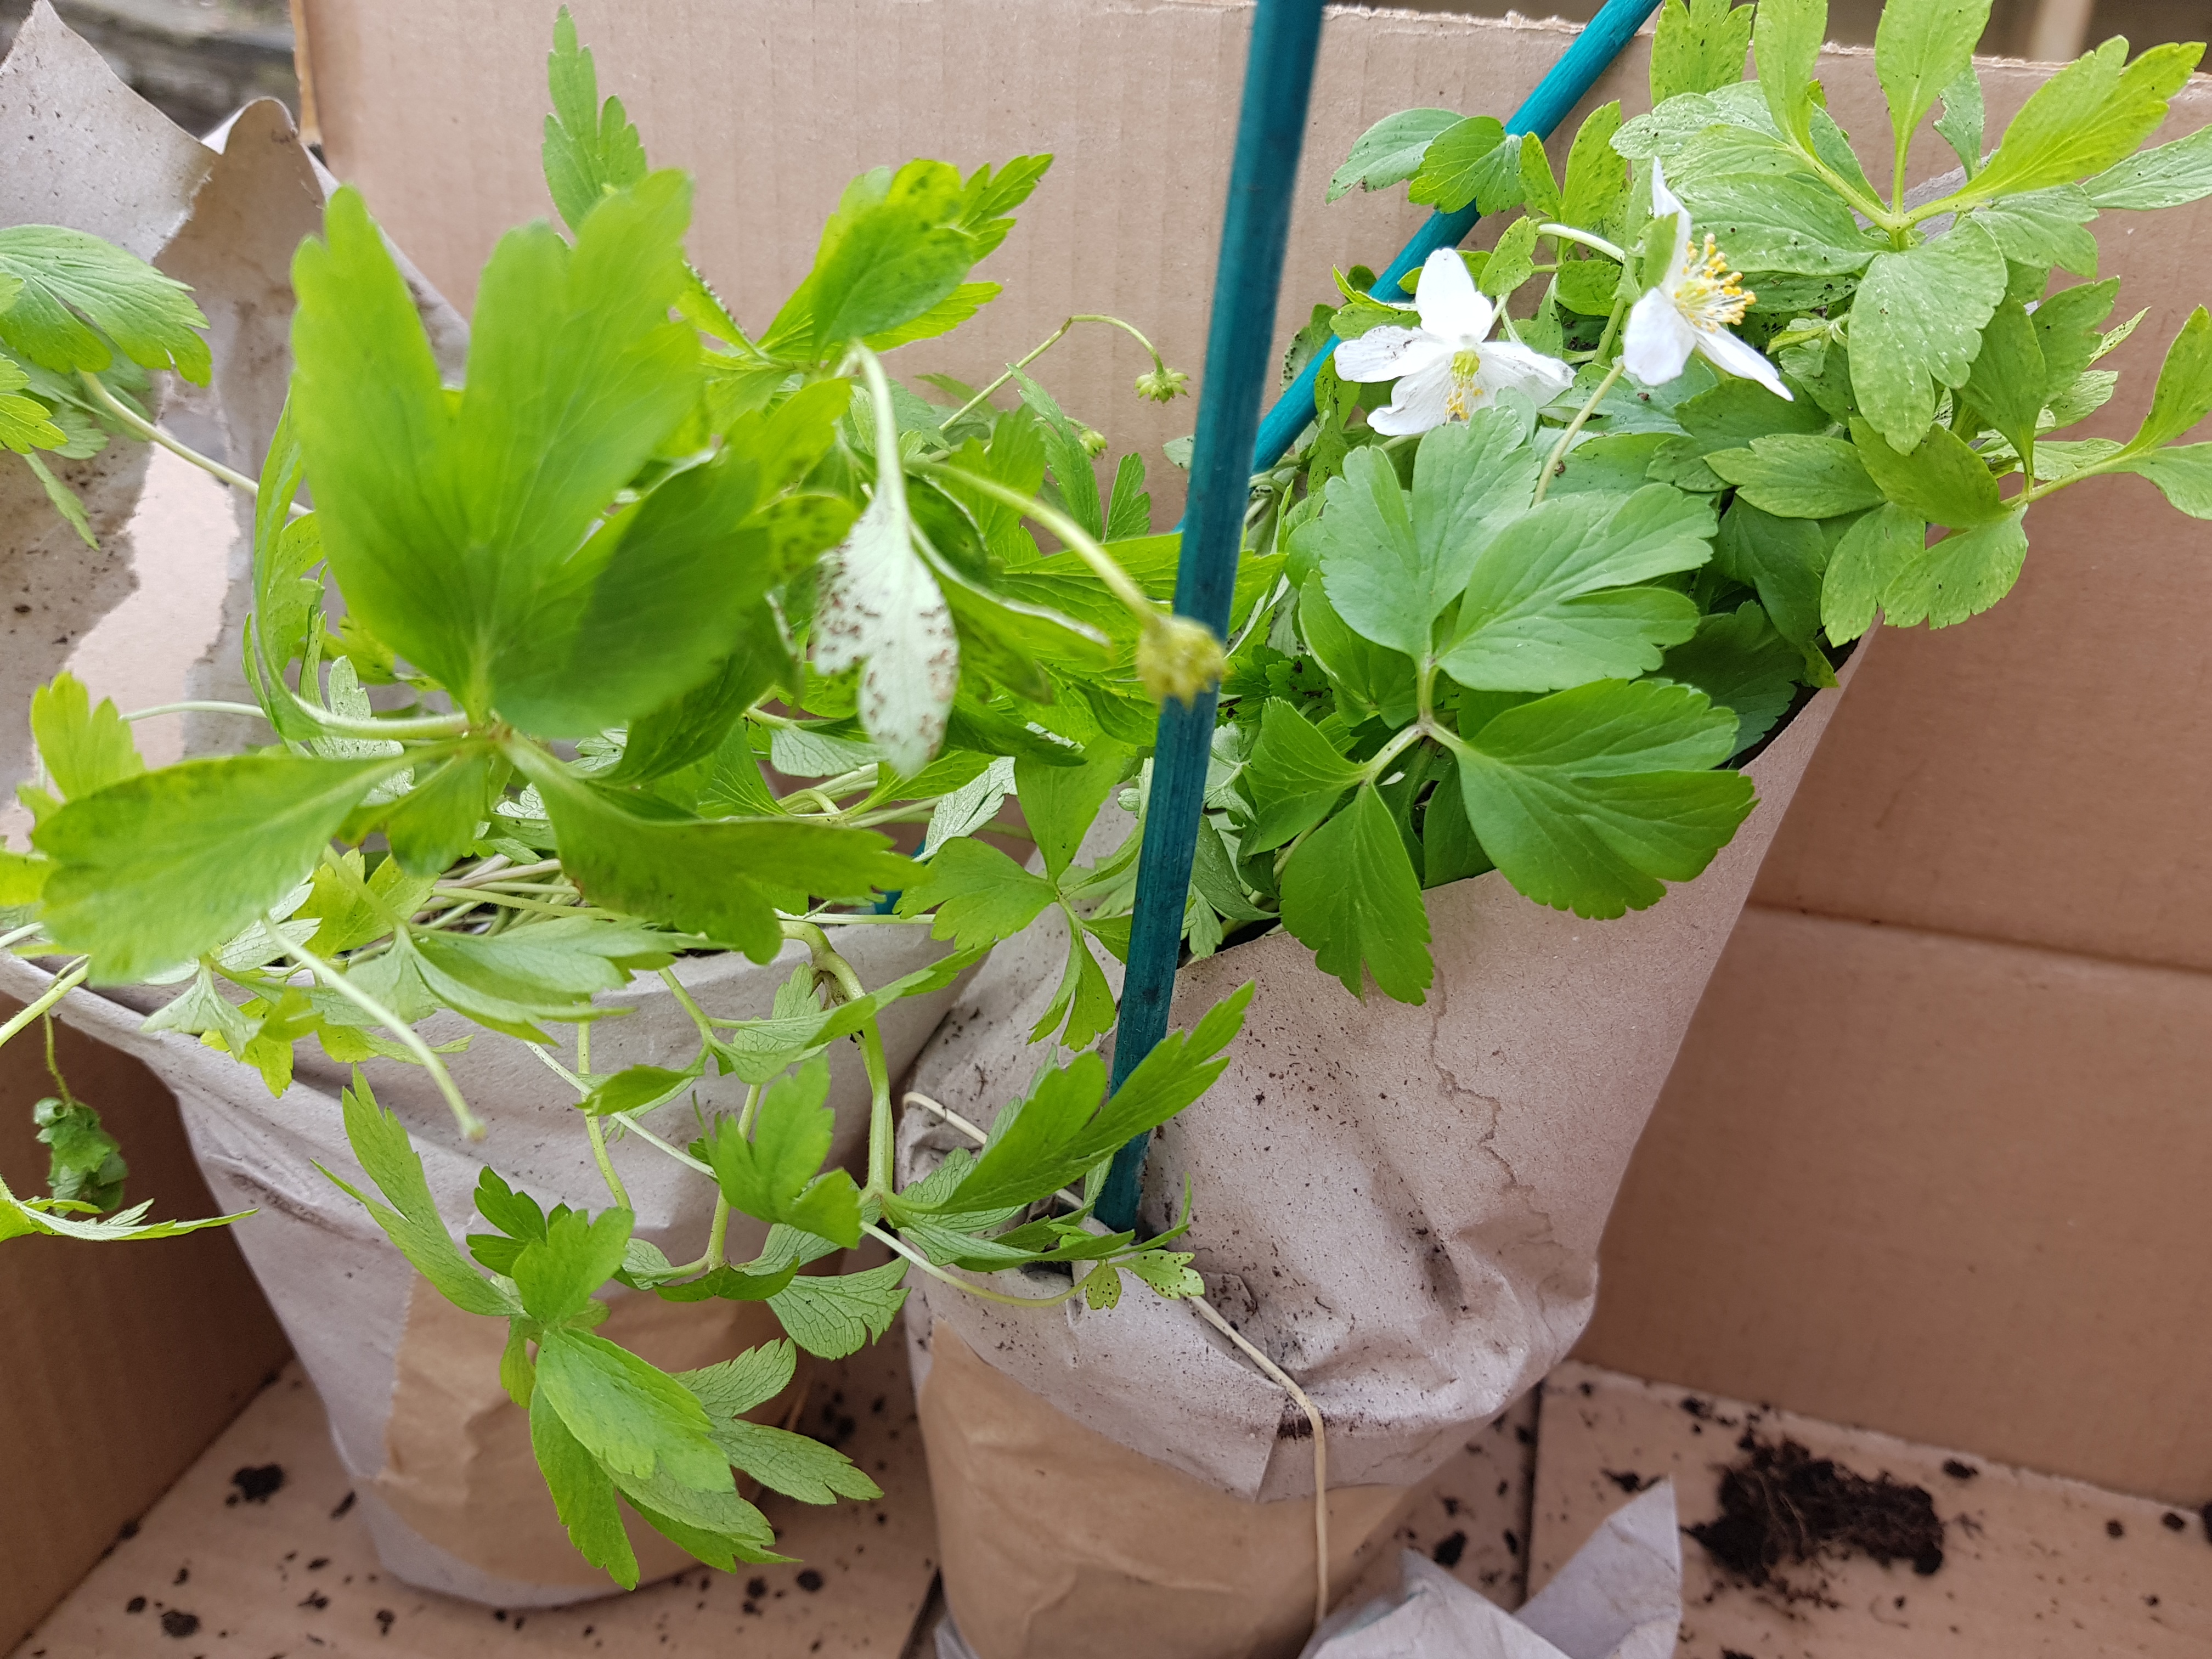
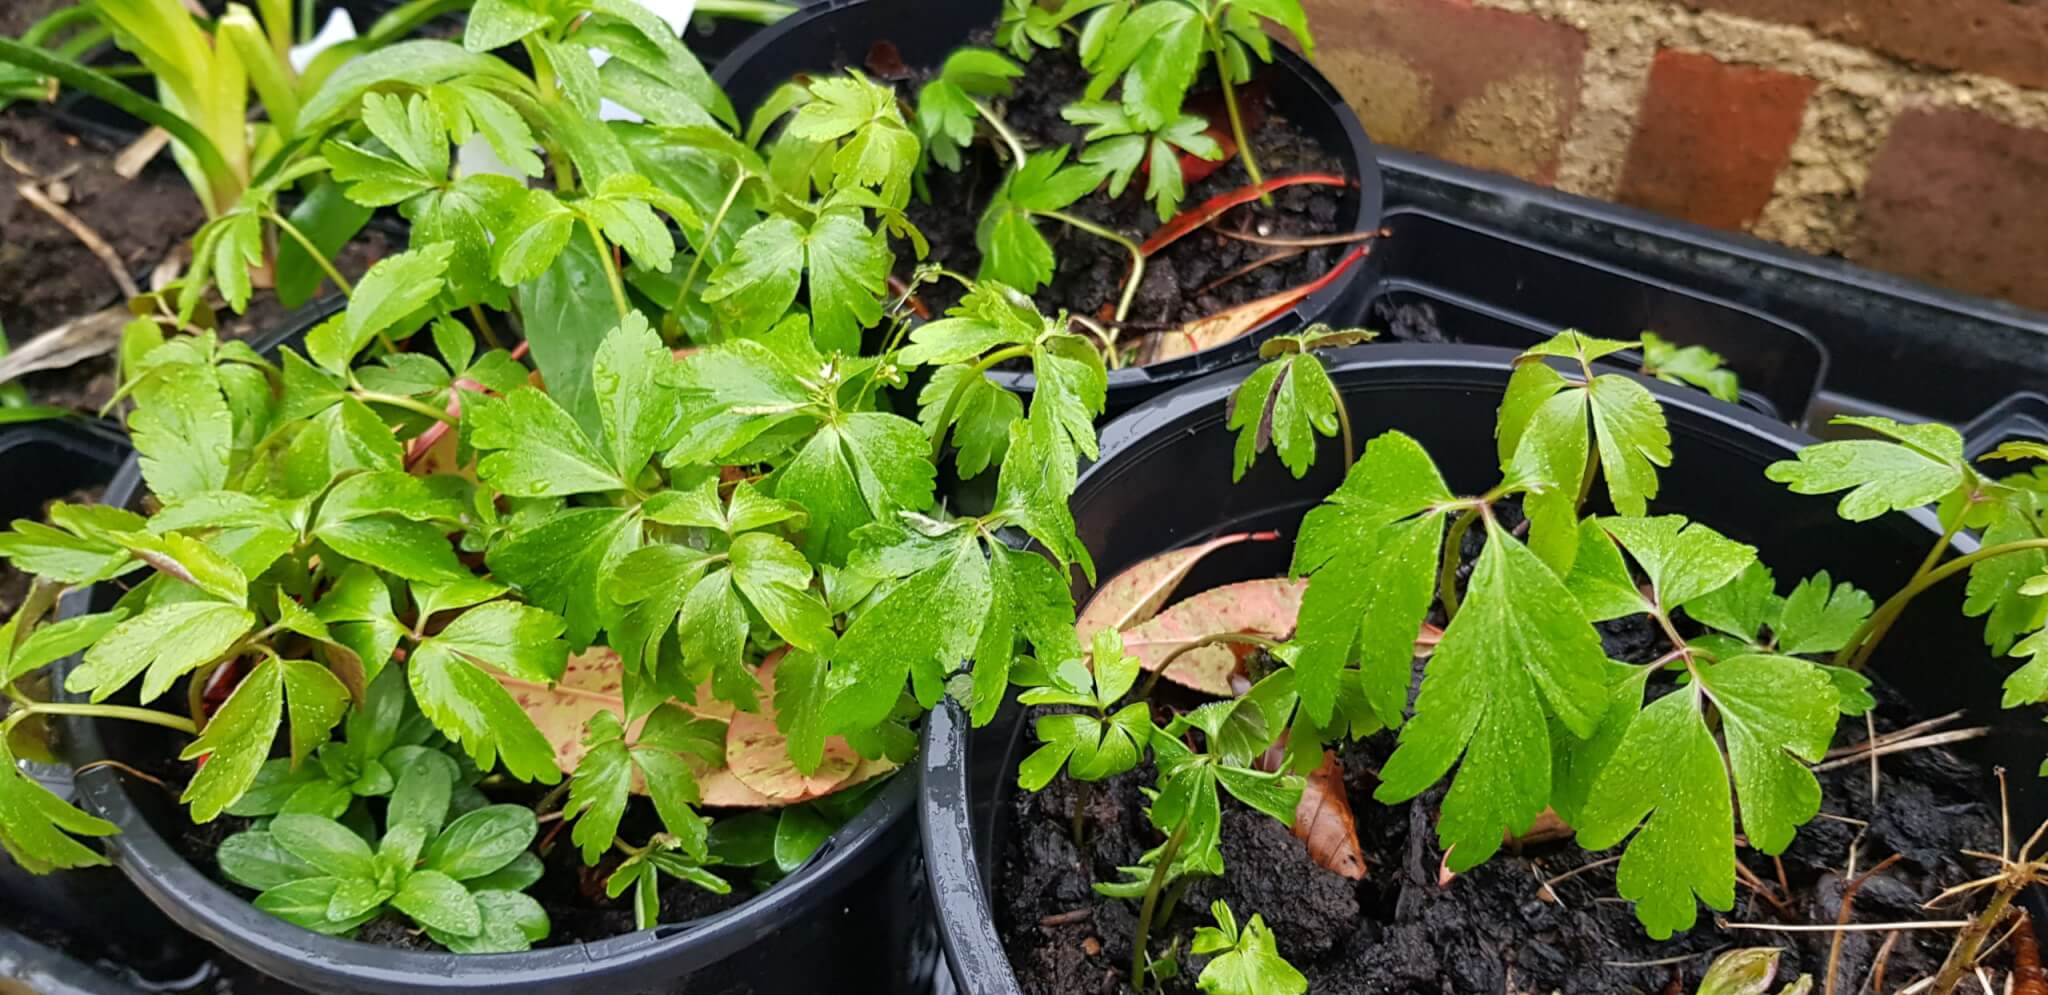
My mail-order plants in compostable pots from the Tiny Plant Company
The advantage of buying plants in the spring is that you can see they are healthy, can see they are in flower, and if looked after should establish well in their first season. The disadvantage is cost.
Last year the Tiny Plant Company kindly sent me their last few plants of Anemone nemorosa, potted in their ingenious compostable non-plastic pots. These beautiful plants cost £2.75 each so unless money is no object, this method is recommended for use in containers, or where a small display is sought in a rockery or border. Another great idea could be to nestle a handful of plants in between tree roots.
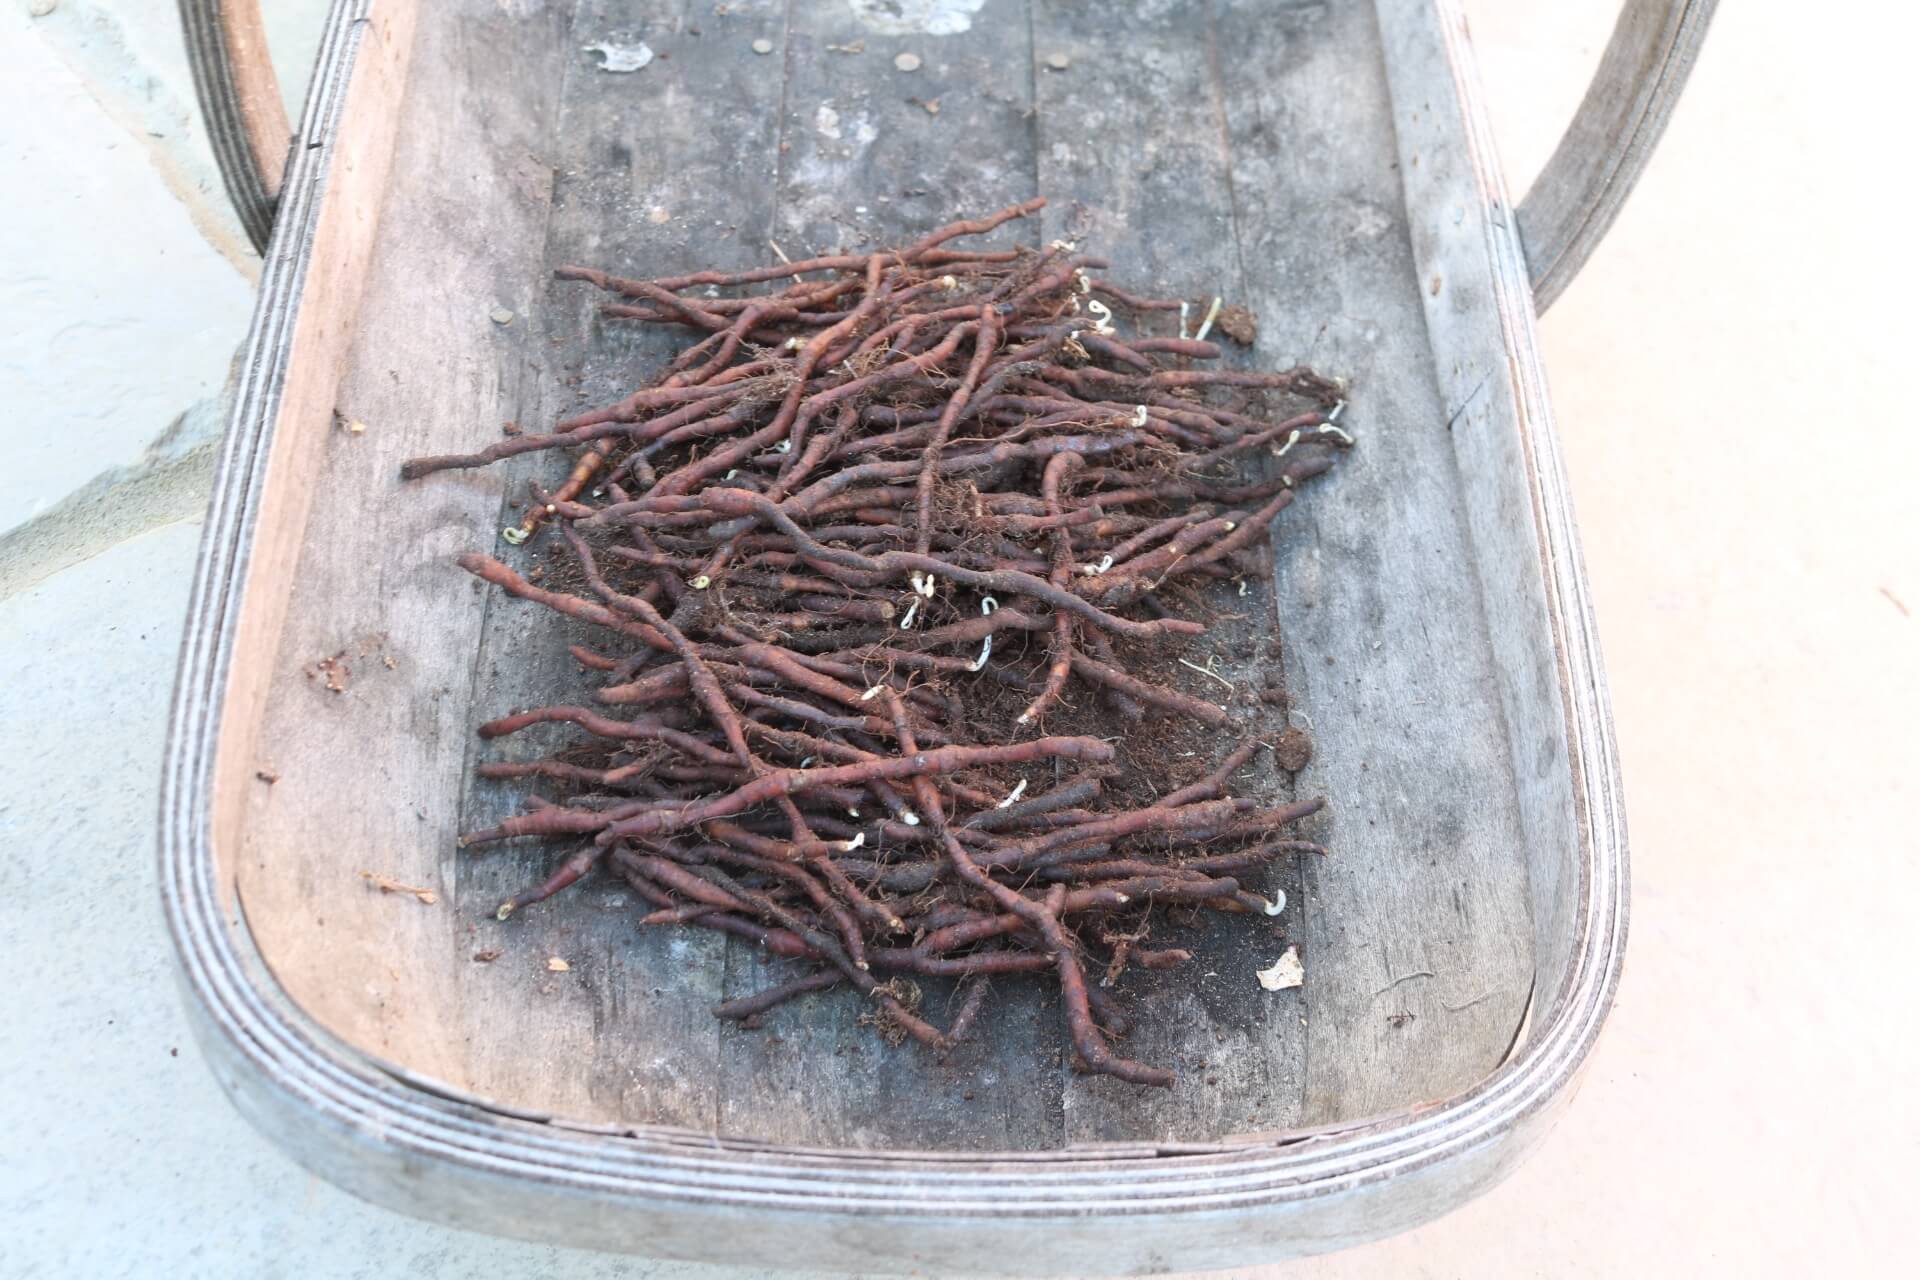
Anemone nemorosa rhizomes
If you’re looking to colonise a bigger area, planting a large number of dormant rhizomes in September, October or early November is the most cost effective method. Some rhizomes are also available to buy in spring. I bought 50 rhizomes from Gee Tee bulbs, costing £12. Many suppliers, including Gee Tee and J Parkers reduce their prices if stock levels allow so it’s not too late to hunt online for a bargain.
I’m going to describe how I planted these out direct in the garden but another option is to pot some up and get them growing strongly before planting out later – as if you were a nursery or garden centre. I have tried this – cramming 6 or more rhizomes into each 2 litre pot last spring. After a wait of almost a year the rhizomes did sprout but not until I’d almost forgotten about them. I’d recommend this only if you have the space to store multiple pots and keep an eye on them. Once planted out they established quickly.
Rhizome preparation
The rhizomes usually arrive fairly dry and packed with a small amount of dessicated compost in a plastic or paper bag. They very in length from 5 – 10cm long and are a deep mahogany brown colour. They look wormlike and fairly unpromising but up close I could see that some of mine were already beginning to sprout.
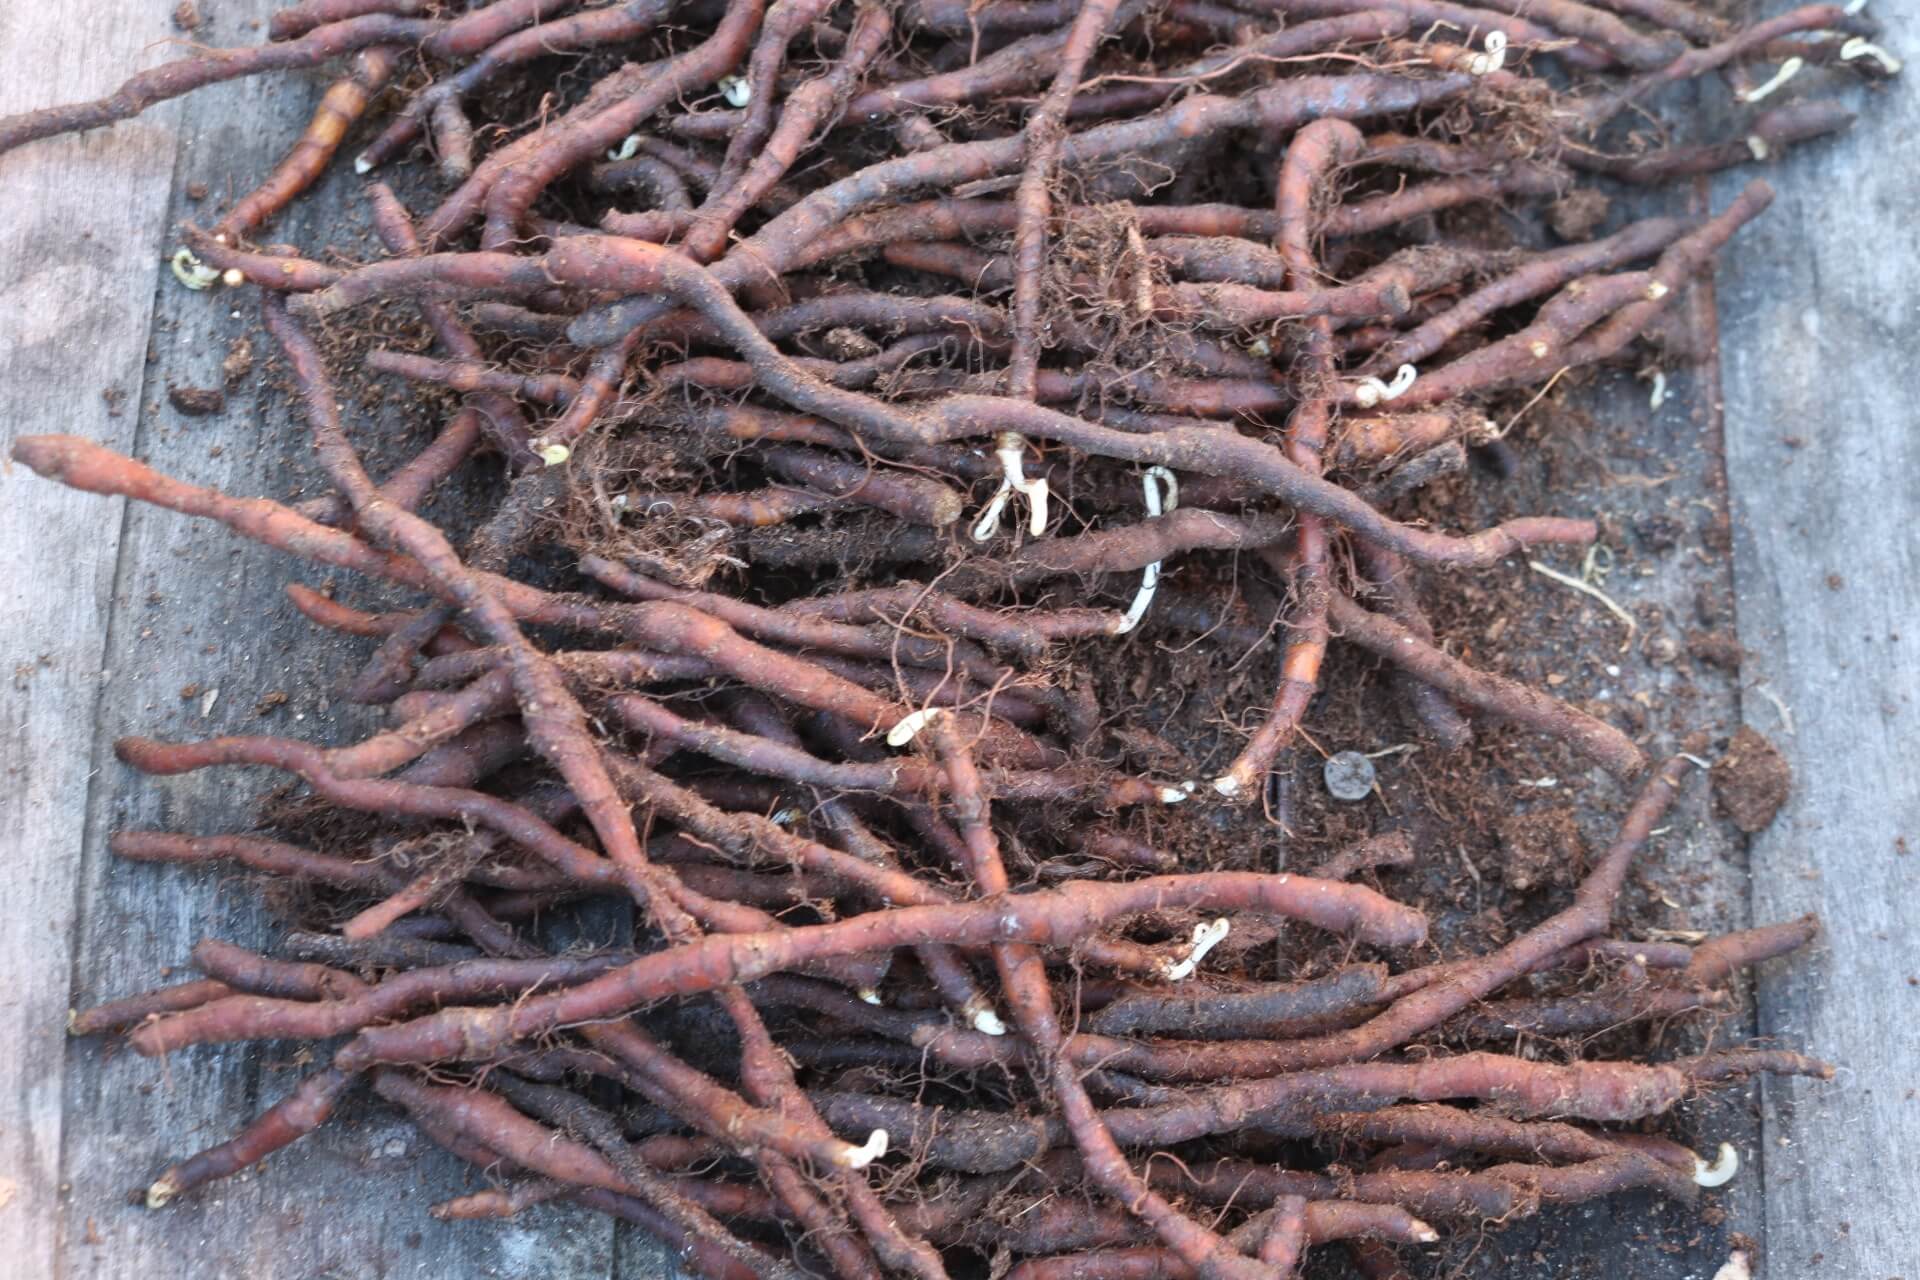
Rhizomes starting to sprout even before planting
It’s a good idea to soak the rhizomes overnight in water to stimulate growth. I didn’t do this as a window opened up for me to plant them when I wasn’t expecting and I was therefore unprepared. I take these opportunities when I can. As I was planting them into fairly moist soil I decided not to worry too much as I could always water them in.
Preparing the site
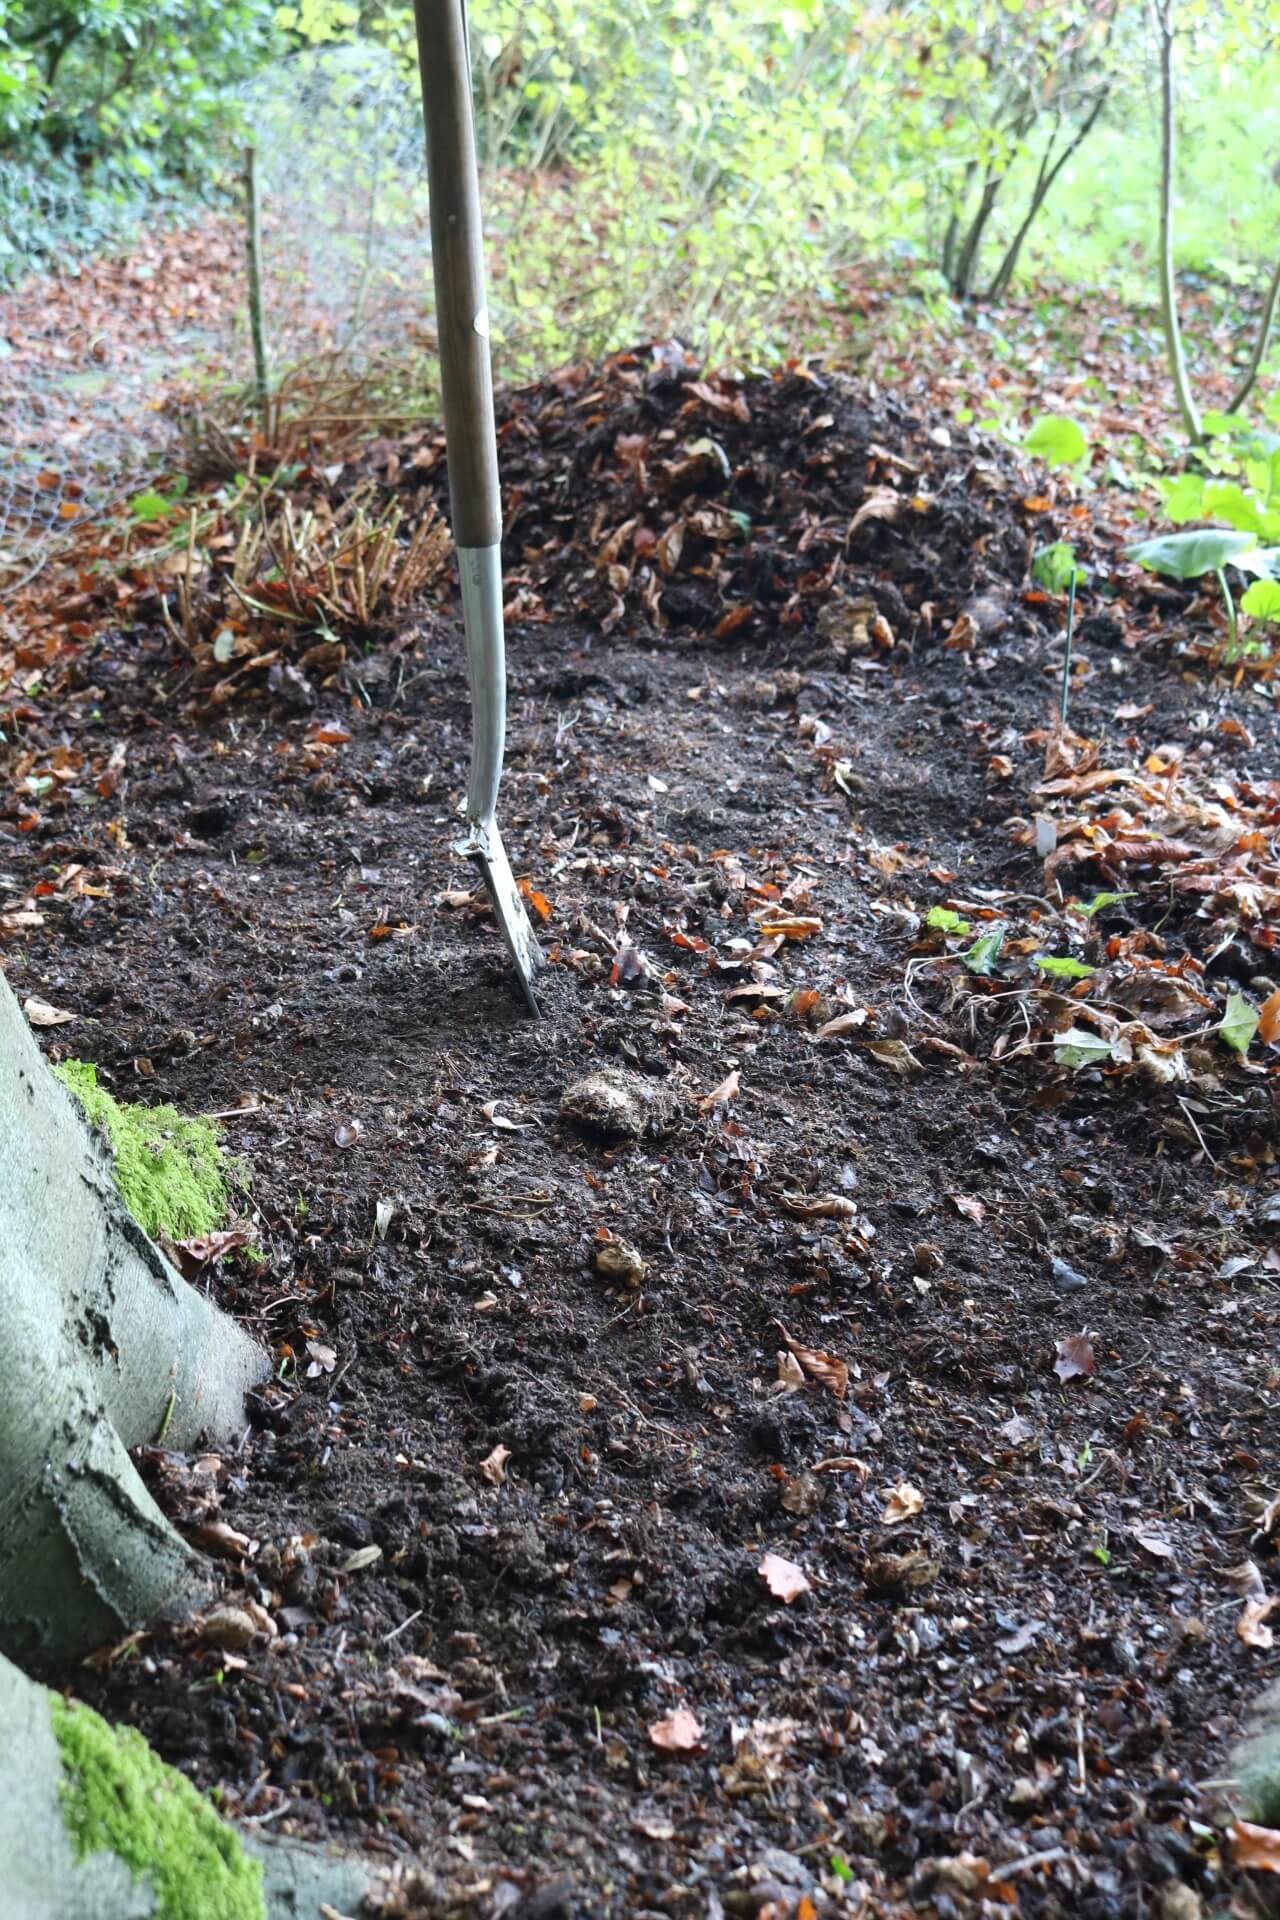
Leaf mould and litter scraped away and stored at the edge of the site.
I started by scraping back the leaf litter and mulch that was lying on my chosen area using a spade. I kept this is a large pile at the edge of the planting area. This revealed plants that I needed to move – the ferns and bergenia and those I needed to weed out, such as the self-seeded hollies and ivy.
I left the cyclamen hederifolium as this is a pretty woodland plant and should provide interest here in autumn if I can get it to spread. I was careful to leave a small area undisturbed as this was where I had planted the plants from the Tiny Flower company last spring. Luckily I had marked these with small green sticks.
Once weeded, I used a spade to scrape off the first 5cm or so of soil, and I placed this is a large trug.
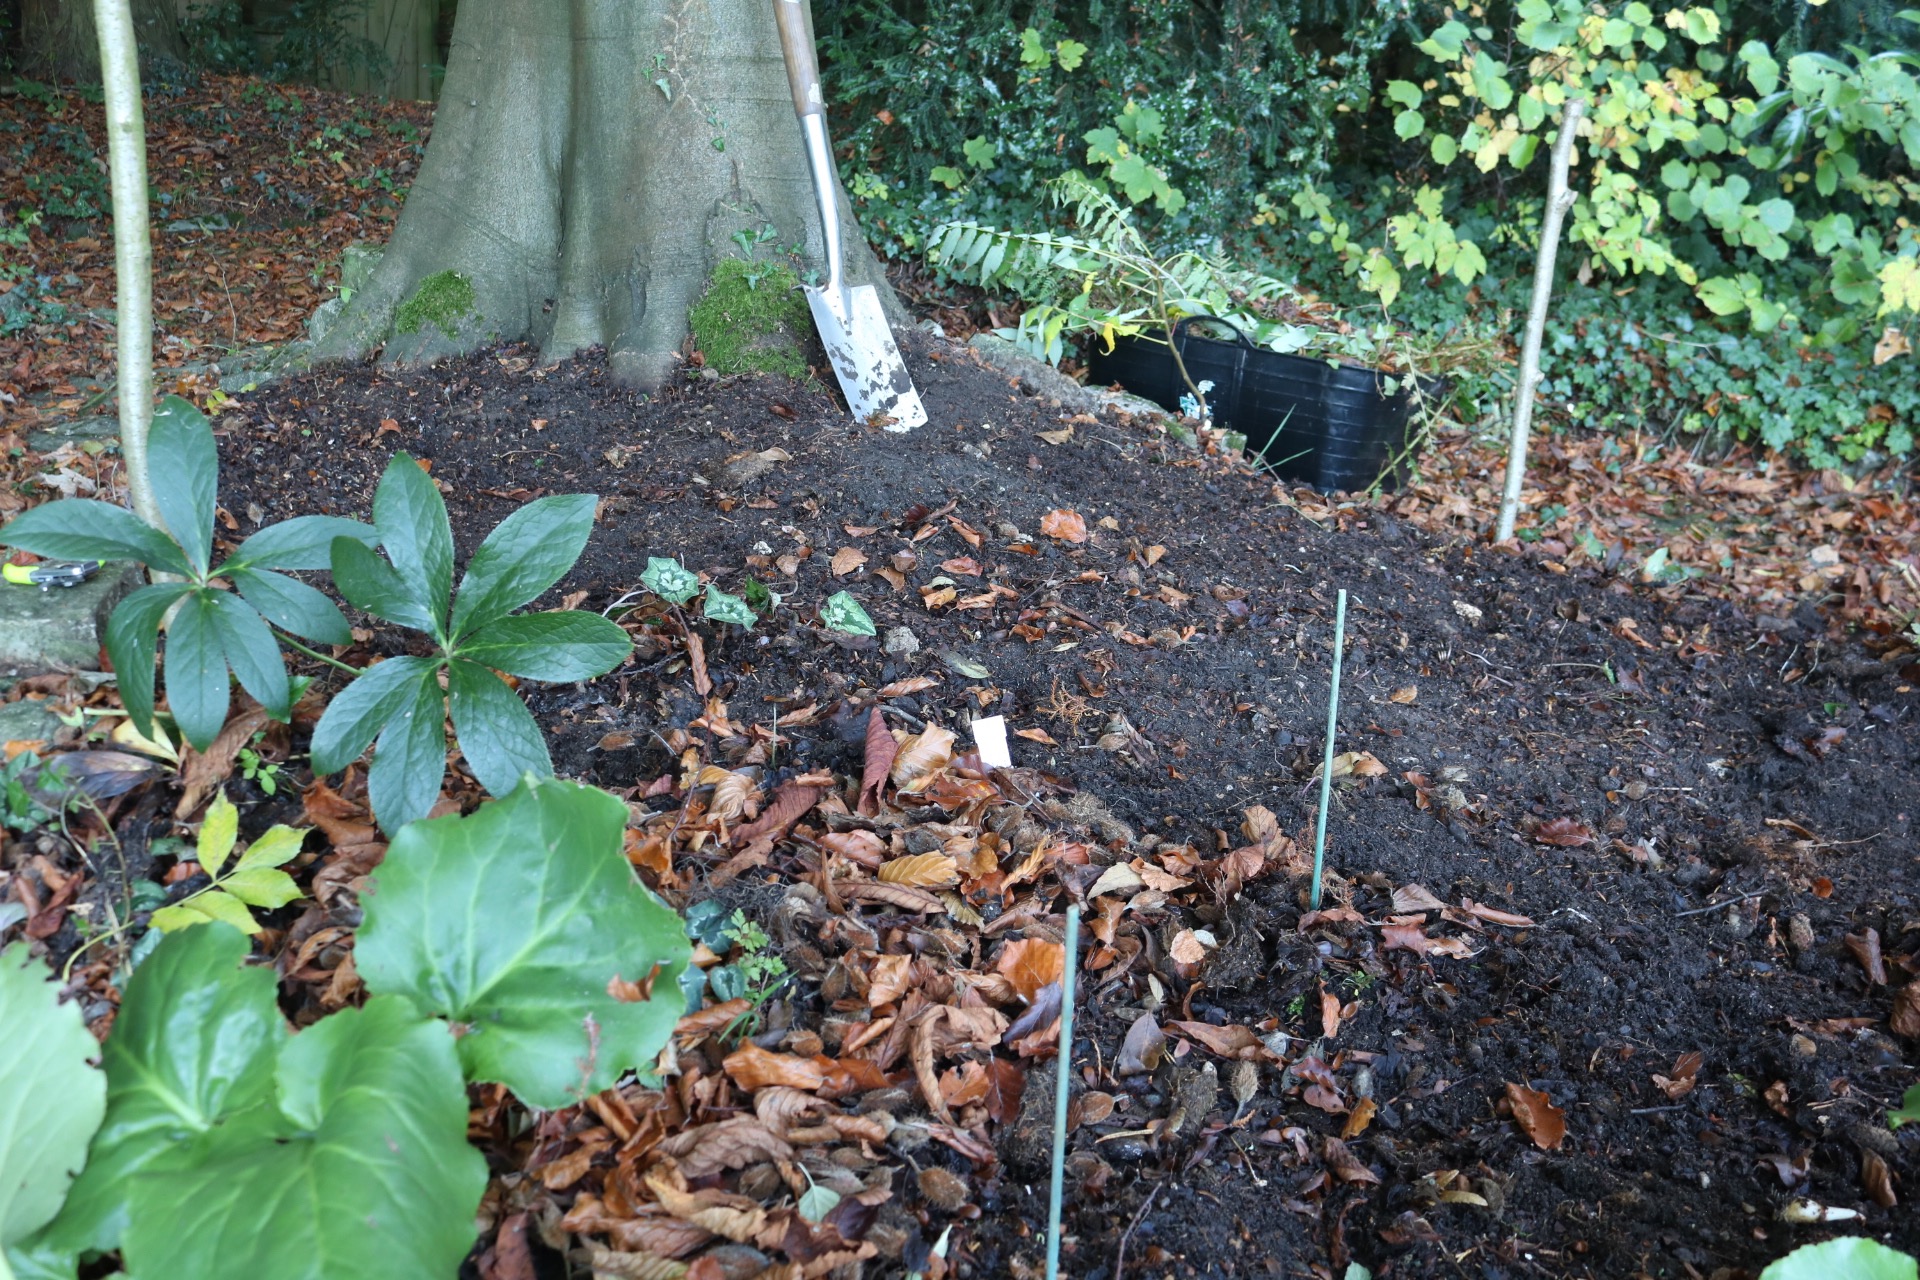
Leaf mould and leaf litter scraped away – then the top 5cm of soil
I then placed the rhizomes horizontally across the entire area, 5-7cm apart, before covering them over with the reserved soil. Suppliers differ in their advice on planting depth with suggestions ranging from 4-10cm.

Wood anemone rhizomes on soil surface
Mine were covered in 5cm of soil, probably the minimum desirable, but I knew I had additional leaf-mould to add on top. You could add extra depth using homemade or bought compost.
Finally, I used a spade to redistribute the reserved leaf mould over the entire area.

Planting finished and area mulched in leaf mould
I watered the area but if you’re planting soaked rhizomes this shouldn’t be necessary.
I await the first signs of growth next spring and hope to share some lovely pictures here. Whilst in year one the display may be sparse, it should develop year after year to provide a stunning carpet of beautiful anemones in years to come.
One year on – an update
A year after I planted the anemones in this area and all are looking healthy. The emerald green leaves shine out amongst the damp leaf litter and whilst there were no flowers in spring, the smattering of leaves shows the rhizomes are establishing and I hope it’s only a matter of time before the flowers come.
Meanwhile, in another shady bed, the anemones that I had planted up in pots have established much quicker and of the two methods, I would say this has been the most successful for me. I’m likely to pot up some more rhizomes next year to add to the ones under the tree shown above.
I continue to read about how tricky wood anemones are to establish and my experience doesn’t argue otherwise. I started this article describing how slow they are to colonise an area and how they are a symbol therefore of ancient woodland. I’ll be waiting for a carpet of those starry white flowers in my garden a bit longer but it will be worth it.
Hello, great post thanks. I planted my rhizomes around the same time as you and a similar location and prep but can’t see any growth yet and it’s March. I wondered how yours are looking now? Maybe I need to start again.
Many thanks.
Hi Leigh-Ann,
So lovely to hear from you and excited we have parallel wood anemone projects. I have a few leaves popping up now but not many. I have been noticing the area has been disturbed, I think by squirrels. I do know that these plants can take a while to take hold and naturalise well but if it’s a good location for them it should work…
I’m thinking I may buy a few actively growing plants as well just to augment the display this year. I’ve seen a few advertised online.
Let me know how you get on.
I have a growing clump of these lovely little flowers growing under a tree in part shade however, the last couple of years although there’s lots of leaf growth hardly any flowers have appeared. Can you tell me why. I sprinkle leaf mold each year on the top.
Hi Jean. Lovely to hear from you. It sounds to me like you’re doing all the right things – leaf mould, good site etc. The only thing I’m wondering is if they’ve dried out a bit in summer. They can tolerate some dryness but maybe if you’ve had drought conditions with the tree roots also taking moisture from the soil, they may have dried out a bit too much?
Thanks Katharine,
Maybe that’s the answer. I’ll try to keep them damp, they are under a tree so that possibly could be the cause.
Hello Katharine,
Thank You so very much for your enormously helpful comments on how to plant my rhizomes that have just arrived . I am now soaking them and will plant them tomorrow.
That’s great to hear Melanie – I hope they do well for you! Mine are slowly establishing and I’ve mulched them again to give them a boost in springtime.
Hi, just opened a packet of roots and had no idea how to go about it so many thanks for your detailed post. It was just what I was looking for! I am hoping to create a little colony near the hedge at the top of my garden under a big birch to remind me of my homeland, Sweden. At the end of the long winter we looked for the first flowers of spring, colts foot, then the blue anemone blanda (I think) followed and finally this lovely white one in great swathes. That was a sure sign that spring was properly under way!
Glad it was helpful. Some of mine are doing very well, and others less so. From what I can tell, the deeper and leafier the soil they’re in the better they have done. Hopefully you can recreate your Swedish memories. I have found Anemone blanda very easy to get established (easier than anemone nemorosa) so if you haven’t done so already, get a few of these in the ground too!
Thanks a lot for the incredibly detailed info. If my replanting works it will be thanks to you 🤗 Jim
Thanks Jim – I wish you well with your anemones. I just went out in the garden today and I have flowers on some of mine for the first time. It’s a long game but worth it…
Thank you for your post. It was the first one I read after a Google search and gave me all the information I needed. I have just received a pack of 100 rhizomes from Naturescape and am looking forward to planting them out and in pots.
Good luck with them Kate – I just checked on mine and after 18 months they are beginning to establish well. I also found a pot that I’d planted some rhizomes in tucked away in a corner so they’ll be planted out under the tree soon…
Thank you for the detailed information on getting these going, much better than what I have found elsewhere.
I will be planting them in my front garden that gets plenty of light but only morning sunshine so hopefully this will be a good environment for them?
It’s always worth trying as they may well get going. From what I can tell, they really like shade in summer – hence why they like woodland environments where the leaf canopy provides cover in the summer months.
I have just read some of the comments above, which were very helpful. I too will be planting some of the rhizomes under a newly planted beech hedge and near a newly planted birch tree. I think that the climate here on the west coast of Scotland will be perfect for the anemones as we get a fair amount of rain, so little chance of them drying out.
Yes – I think they do want a bit of moisture to get established, a bit of sunshine and a bit of shade. It sounds like you’ve got a good spot for them there. Good luck!
Hello. I have just received a batch of wood anemone rhizomes in the post. I was planning to wait a week before taking them to plant on my husband’s woodland grave so that the family can be there too. I am now concerned that I shouldn’t wait so long but should soak them as soon as possible and get them in. Can you advise me?
Hi Eleanor, Sorry I have seen this message late – I had a few technical difficulties which are now resolved. I would give them a soak and then store them in a cool place but covered to keep them moist but not too damp. I really hope they develop well and become a beautiful adornment to your husband’s grave.
Hi Katharine. I have just received some rhizomes of this lovely plant, 25 in total. I think I may go with your idea of planting into pots rather than directly into the ground. Then once they have produced some growth, plant them out. I’m trying to find a place in the garden with little competition from other plants, as I don’t know how competitive they are. I like your location beneath the beech tree.
Hi Andy – on balance I think the pot method is a better one – it gives you more control and reassurance that they are well established before planting out. Even so, they take a while to really feel at home where you eventually plant them. We need patience to grow these. Under a deciduous tree is teh perfect site for these.
Hi Katharine. What a wonderful post – thank you! I just received some rhizomes of Anemone nemorosa today and was thinking of planting first in pots to get them established before planting out under trees. Thanks so much for the advice about the moist conditions – I will change my plan as the spot I had in mind for their eventual home is really rather dry. I have a question about planting in pots if that’s OK? I don’t have a greenhouse. Would it be better to place the pots outside, or on a window sill inside? Presumably plant about 6cm deep and make sure they don’t dry out, and then wait (a long time) – correct?
PS – I love the spelling of your name, it seems quite unusual to have 2 “a”s? My sister is Catharine (named after the Cambridge University college where my father studied). 🙂
Thanks for the feedback Sorrel. Yes my name is a more unusual spelling – I understand it’s from the greek word for pure – katharos. On the wood anemones, the pots do not need to be in a greenhouse. Just pot up your rhizomes and leave them outdoors. Mine took a while to sprout and I’d almost forgotten about them and then one day I spotted them with lots of healthy shoots. I think it was at least 9 months before I spotted the shoots but honestly they could have been there sooner and I just hadn’t checked!
Thank you for a useful post. I have planted my anemone nemorosa rhizomes in 2 locations to see which fare best – one very shady but more moist, one a bit sunnier – still mainly shade but more of a slope and under trees.
I also planted a few anemone nemorosa Blanda winter wildflower (blues) and anemone nemorosa robinsoniana which should be pale blue (because I like the name) in the more sloping / slightly sunnier area. I will be interested to see what happens. I was excited to use the first ‘crop’ of my own compost in the process!
Hi Penny, I hope your plants have done well. Robinsonia is a really stunning variety and the pale blue is almost ethereal.
Thank you for this fabulously helpful page! It was exactly what I was looking for!
Hi have been offered some activ windowed bulbs. Too late to bloom this year in London. Thanks for for your straightforward info and enthusiasm
Best wishes
Gerald Berman
Thank you so much. I am a Trustee (ie litter picker/planter) of a small open space in Sussex and I bought wood anemones a year ago and potted them up in order to establish them in a small copse that grew up after the 1987 hurricane. Some beeches and birches were planted on what had been a bare north facing slope, full of Victorian rubbish (it was just over the former Borough Boundary and clearly littering manners were no better than today – they just threw over everything until about 1920, as far as we can see from our “finds”). I suspect it may have had a lot of ash in it too. I am concerned about drought but it has had 20 plus years of beech leaves and we have our own compost heaps producing compost and leaf mould. Your post is detailed and very helpful, so I shall plant out my pot, add lots of leaf mould and hope we develop a carpet of them to follow on from the native snow drops we planted a few years ago. We planted cyclamen too and native bluebells. An inspiring and helpful post!
Thanks Elizabeth, I’m glad you liked it.
Hi Katharine, I was really pleased to find your post today. I was trawling the internet to find out what the shoots look like when they first appear. I planted about 150 rhizomes last autumn in a very similar position under our beech tree. I left some little white labels to remind me where they were but had no idea what to expect. I can see lots of thin stalks emerging in that area but honestly they could be anything. I’m so looking forward to the anemones appearing. Fingers crossed. Janis x
Hello! I’m in Ullapool in the NW Highlands. There are wild wood anenome s in the park, just at the side of where we live but I bought rhizomes to plant in my front garden last Winter. Much to my surprise, even though I knew it was the wrong time of year to plant them, one rhizome flowed immediately! That was spring 22 with the help of your blog entry. Now I’m also finding the comments section helpful in terms of when to expect any signs of life this year. I planted the rhizomes directly into a mossy lawn under a maple tree and so I’m hoping to get some show of flowers this spring, although we have just had snow again so maybe not for another month!
Hi Rosemary – lovely to hear from you and I hope you had a good show this season. They are such beautiful flowers!
Hello Katharine,
I have a small patch of the white wood anemones which are fairly overgrown with moss. I’ve tried picking it off but i often disturb the rhizomes that break because they are so wet. I do have some flowers each year, but I think the plant would produce more without the moss. Do I remove the moss and risk losing some rhizomes or leave the moss that I fear will overgrow the plant?
Tricky problem that one. Are the rhizomes at or close to the surface then? My experience of the rhizomes is that they bud along their length so I wouldn’t think it matters if they do break. Just replant them. Good luck!
Hello
Thanks for this info, really helpful. I’m intending to plant rhizomes in pots to later transfer into desired final location once the anemones are established. I will plant up in the Autumn, will the pots be ok to overwinter outside?
Yes, They will be fine to overwinter outside. I put mine somewhere shady and a bit sheltered. Good luck. My patch is now really filling out and the flowers are a delight to see.