The joy of a home-grown halloween pumpkin
My children know that I dislike Halloween. The fake spider webs and mountains of sweets rather turn my stomach. Halloween is great for one thing though – the pumpkins and squash.
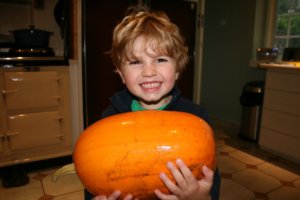
For several years my father would grow the classic orange pumpkins for his grandchildren to carve into lanterns. He would unload them proudly from the car and offer them up to the shrieking children. The fact that you could get them from any supermarket for little more than a pound each was irrelevant. He had put love into growing them and the significance of this was not lost on us.
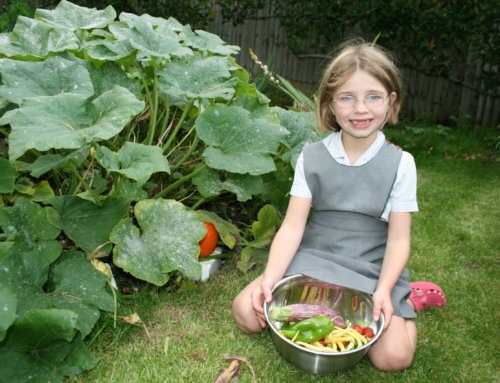
Grow your own and you will share this joy. You will also be able to grow wacky-shaped or unusual coloured types to decorate the doorstep and home next Halloween and to provide vegetables that will store well into winter for delicious meals.
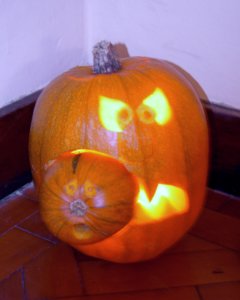
Halloween lantern – two different sized homegrown pumpkins used to good effect
The squash and pumpkin family
Squash and pumpkins come from the same family, with the charming but awkward to say name; curcurbitaceae. Also in the family are melons, guords, courgettes and cucumber, with an incredible 975 different species of edible and ornamental plants.
They share the characteristics of large fresh green leaves, a tendancy to spread or to climb using elaborate curly tendrils, and have yellow trumpet shaped edible flowers.
Included in this family are what are decribed as ‘winter squash’ and ‘summer squash’ by the seed industry.
‘Winter squash’ essentially describes a squash or pumpkin that can be stored for several weeks, even months, well into the winter, to be cooked when required.
‘Summer squash’, sometimes referred to as patty-pan varieties, cannot be stored for any length of time, and should be treated and indeed cooked in a similar way to you would courgettes.
This article discusses only winter squash varieties and pumpkins.
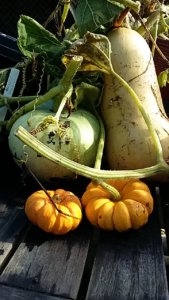
Selection of squash – Crown Prince, Hunter and Munchkin
Choosing your seeds
If you want the classic orange oval pumpkin for halloween then you will be able to buy seeds from any garden centre or mail order supplier, usually called ‘Jack-o-lantern’ or ‘Halloween’ and often in a seed packet decorated with unmistakeable ghosts and ghouls. These varieties rarely make the best eaters and usually have a watery rather insipid taste.
Halloween varieties are no easier to grow than other types – so why not try something a bit different? If you still need convincing here’s a link to a UK supplier called The Real Seed Catalogue which lists a huge range of delightfully shaped pumpkin and squash, including some rather rare ones.
Do you still want to grow a basic orange one?
For impact and taste I now always choose varieties of squash and pumpkin that are good to eat and look good in a halloween display either carved or not. If you choose one that tastes nice, you can have a great soup to eat on Halloween using the scraped out insides.
I usually grow six plants in a patch in my veg garden about 3m x 2m. If you haven’t got much space, only grow one or two, choose a small variety or think about growing upwards and letting your plant climb. Remember that all varieties do have the ability to climb if trained and supported accordingly.
In London I had a tiny courtyard garden and grew a plant out of the flower bed, up my fence and over to my neighbour’s side. A fat pumpkin grew on top of his shed in glorious isolation and splendid sunshine. Many growers also advocate growing squash and pumpkin in a compost heap, where it can scramble away, it’s roots fed with glorious humous-rich matter.
Easy varieties to grow
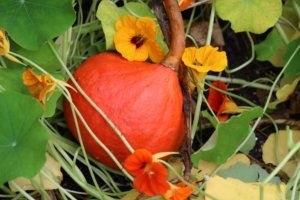
Squash Red Kuri growing with yellow and orange nasturtium
Squash Red Kuri or Acihiki Kuri– these two varieties are a beautiful fiery orangey-red, the colour of volcanic magma. I don’t bother to carve these but love the way they look in a mixed decoration – and they have a good nutty taste and store for 4-5 months too.
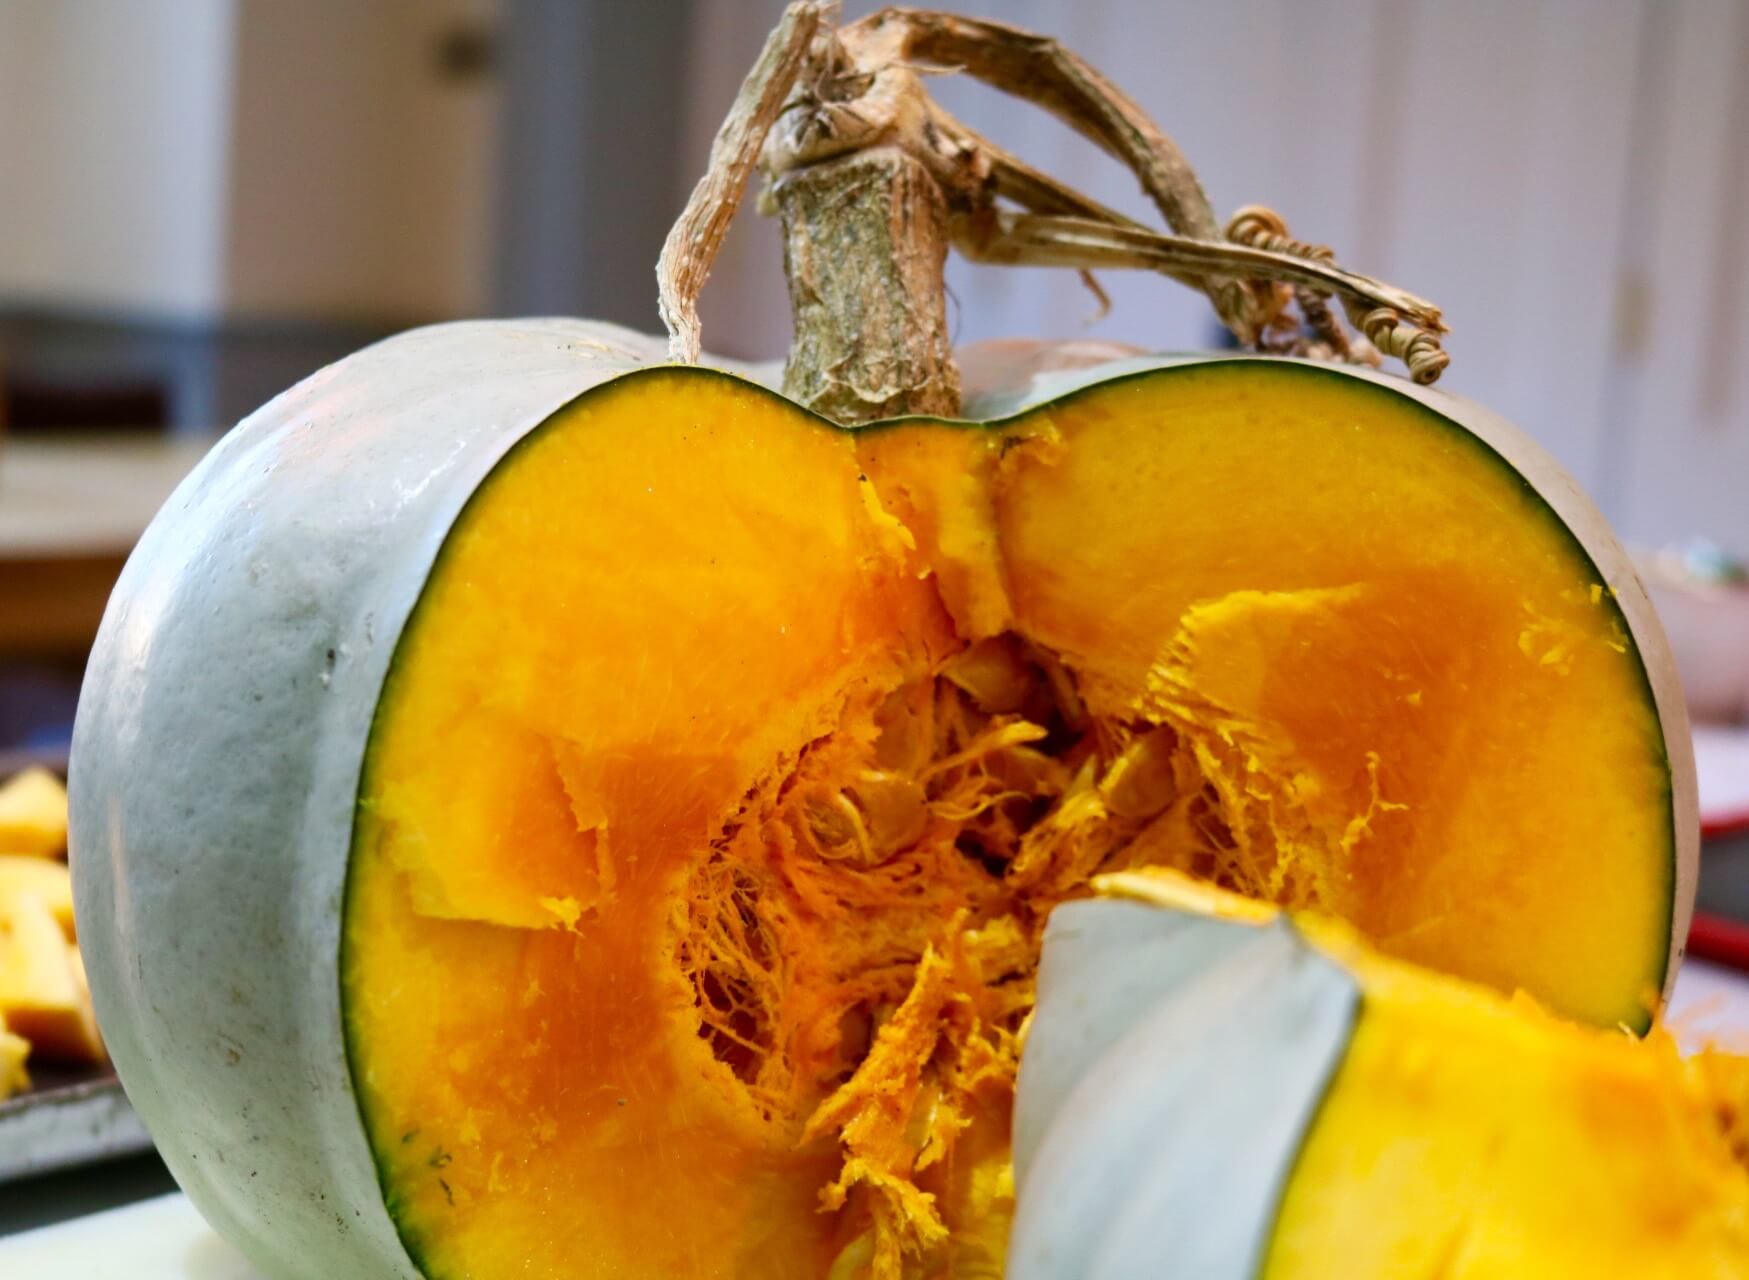
Crown Prince – this has sage green outer coating, not a classic halloween orange, but is very pretty. When you cut it open it has fabulous satsuma-orange flesh which is extraordinarily tasty. Well worth growing and will keep very well into winter.
Hunter F1– this is not a spherical squash but is the classic butter-nut squash shape and very good for eating.
Munchkin or Orangita – Great if you haven’t got much space – these two varieties are both teeny tiny little squash with the classic ‘cinderella coach’ ridging. They usually only grow to the size of a tennis ball. They make attractive additions to the veg patch, or even in a flower bed when grown on a wigwam. Can be roasted whole as a tasty vegetable dish.
Festival – a classic ridged shape in two tone orange and yellow. Only supposed to grow to the size of a grapefruit. I have had some grow much larger than this in the past and have carved them for a wonderful effect.
I have bought squash seeds in the past from Dobies, Marshalls, and Unwins.
How to grow squash and pumpkins from seed
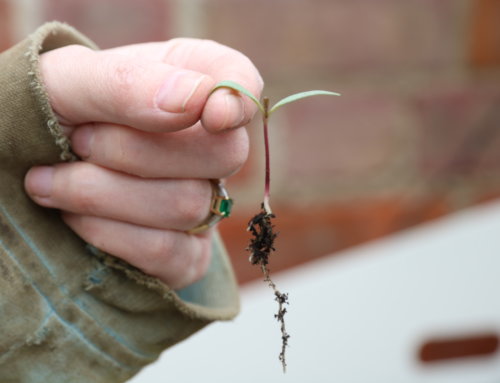
Squash and pumpkins are very easy to grow from seed and it’s a great thing to do with children as the seeds are easy to handle and tend to germinate quickly.
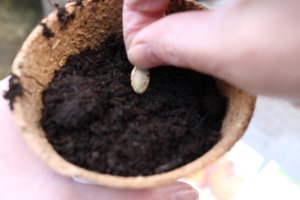
As the seeds are large, they are best sown individually in pots or modules. This year I have sown them in individual fibre pots so that they can be planted straight out in the patch, pot and all. I use ordinary multi-purpose compost sieved into the pot.
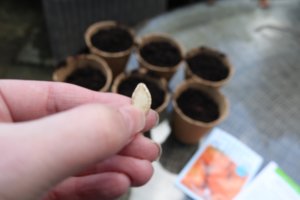
Seeds ready to plant
A good thing to remember when planting squash or pumpkin seeds is to slide them into the compost on their sides or bolt upright. If they are flat to the compost they are apparantly more likely to rot – but they may not, so if you’re planting with children don’t panic too much about this and plant a few so you have spares.
To aid germination, keep the pots somewhere warm, preferably 20 degrees or so (maybe a windowsill indoors if you haven’t got a warm greenhouse or propagator with lid).
The perfect bright green leaves should emerge within a week or two and sometimes they do so with the seed on top like a little hat. You can pull this off gently if you like, although it should drop off on its own as the leaf continues to unfurl.
Planting out your squash and pumpkin plants
You should keep your seedlings protected from frost so I rarely plant mine out where I live until late May. Dig over your bed and remove any weeds. Don’t grumble about the weeding – the beauty of squash is that once they get going they smother the patch in their large leaves and tend to outcompete the weeds – leaving you put your feet up or focus your trowel elsewhere.
My father’s patented planting technique, which I have since adopted, is to dig out a large hole, say 30x30cm and at least that deep. Fill the hole with manure, even heaping it into a little mound, and plant the seedling directly into the manure. Pull a bit of the soil around them and water. Squash are hungry feeders and should really love you for this technique. Otherwise you could feed with chicken manure pellets at the base of each plant throughout June, July and early August.
I have noticed that sometimes my squash sit there looking a bit disgruntled for a while after planting, at least until the warm weather really kicks in.
Once they get going though they’re like a greyhound out of the traps. You will find the tendrilled stalks – often known as vines – snaking across the patch and onto neighbouring paths and twisting amongst each-other. If they go over my paths I will pick them up and curve them around the bed but otherwise I let them rampage over the whole area like teenagers at a party.
Signs of fruit set
Once they start putting up their yellow trumpet shaped flowers (which are edible and good in salads) have a good look at the plant. Each plant carries both male and female flowers. The female flowers have round ovum at the base of each flower, usually pale yellow in colour and the size of a large marble. The male flowers look the same but have no marble at the base.
You’re not going to get pumpkins if you don’t have both male and female flowers. If you have both and lots of bees buzzing about, you’ve got a good chance of fruit. When germinated the ovum at the base of the female flower starts to swell. On most plants you’ll get a few where the flower shrivels and the ovum shrinks and rots, the result of failed germination.
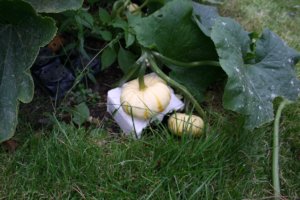
At this point, your plants will be smothered in leaves and it’s sometimes difficult to see the growing fruit underneath. If you do spot some, it’s a good idea to put something under them to lift them off the soil surface to keep them clean and away from any damp, which can pucker the skin.
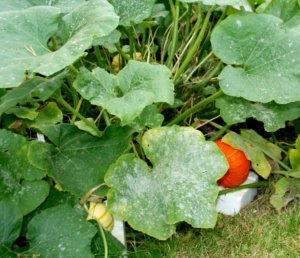
Large leaves – can you spot a third fruit here?
I put mine on upturned ploystyrene trays that bedding plants come in, or on offcuts of wood. If you can balance them on their bottoms, you’ll get more even growth and a rounder shape as they can be lop-sided if they grow on their sides.
I try to monitor how many pumpkins are growing and stop the vines by cutting off the growing tip once I have two healthy fruits growing. The plant will put energy into making these large and tasty rather than producing further inferior fruits.
Swelling pumpkin balanced on a polystyrene tray. Signs of mildew on leaves.
A word about mildew
Most varieties of squash and pumpkin are susceptible to mildew, a fungal disease that leaves a white powdery thin coating on the leaves. It can be a sign of insufficient watering so do pay attention to this in dry weather.
I’ve not had mildew very badly in the past and it is not something I worry hugely about treating aside from watering. In my experience the worst that can happen is the leaves dying back slightly prematurely, which may affect the size of the fruit.
Lifting and storing
By late august, the leaves of your plants will be dying down, usually revealing your fruit scattered randomly over your patch – a lovely sight. It’s a good idea anyway to cut your leaves back a bit so that the sun can get to the fruit to ripen them and toughen up the skin.
You can leave them where they are but when autumn rains begin to come, I tend to pick mine and place them in a greenhouse or on a table outside – to keep them slightly drier to continue ripening when the sun comes out.
To harvest them, cut them from the vine with knife or secateurs, leaving a longish amount of stalk. Don’t cut the stalk right back to the top of the fruit as it won’t store for so long.
Most varieties will store beyond Christmas if kept somewhere dry and cool. Last year I lost a couple as the shed I chose was rather damp.
Have fun with decoration
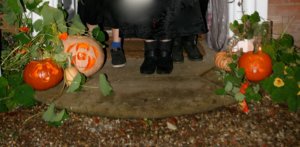
Halloween doorstep with home grown pumpkins, trailing nasturtium and trick-or treaters’ feet.
Amassing pumpkins and squash of different shapes and sizes, carved or uncarved on your doorstep will create a welcoming decoration if you do wish to encourage trick or treaters. I grow allot of nasturtium in my veg patch as they are an attractive weed smotherer and you can eat the flowers.
I like to cut some to trail around and over my pumpkins. The yellow and orange flowers are just the ticket to complete the halloween look.
Remember you don’t have to carve your pumpkins to make lanterns. You could pile them up around your doorstep and put candles in storm vases instead.
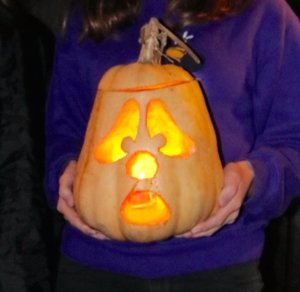
Halloween lantern – this is a butternut variety that grew rather large
What a great blog post! I am growing a few this year. Red Kuri, Honey Boat and Tromboncino. Firdt time in all cases. Plus regular courgette.
You’ve chosen a good selection there. You should definitely try my father’s trick of planting directly into a hole filled with manure. Works a treat! Thanks so much for the lovely feedback.