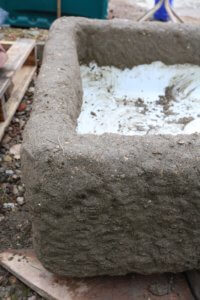
An artificial stone trough looking far from fake and filled with delightful alpines
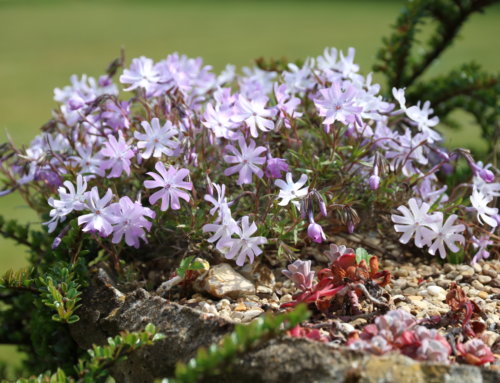
Stone troughs are a perfect foil for tough but beautiful little alpine plants. Rock chicks of the mountains, these plants are best displayed with stones and gravel and need good drainage. Alpines are great plants to grow, suit a small garden, roof terrace or balcony and have something to offer the beginner gardener or alpine expert.
Of course you can grow alpines in wooden boxes, terracotta pans, or indeed any container where good drainage can be supplied – but I think the traditional stone trough, aged with moss and lichen, can be hard to beat aesthetically. They provide the perfect show stage for rock chick plants.
Real stone or fake?
Real stone troughs can be very expensive to buy, particularly antique ones carved from whole pieces of limestone or sandstone. You can expect to pay in excess of £1000 for a large one and even a small good quality one measuring 50cm x 40cm will set you back several hundred pounds. Solid stone troughs are also extremely heavy and expensive to ship or transport.
Bargains can be found on ebay and other online auction sites but courier prices can be large unless you can can find a seller nearby.
The alternative is to make a trough that looks like stone, but isn’t and will cost you a fraction of the price. Unlike fake grass or plastic plants, this is one hack that really works and not only is it cheap and easy to do but the resulting troughs can be hard to distinguish from real stone, particularly after a season or two of weathering.
Look-alike stone in hypertufa
I am not practical when it comes to DIY but making a mix called hypertufa to cover an old sink was unbelievably easy and fun to do. I’m doing nothing new here. The wonderful Alpine Garden Society has a fantastic downloadable PDF on their website which describes how to do this, as well as how to cover polystyrene fish boxes or to fashion a trough by sandwiching hypertufa between two cardboard boxes.
I remember the cardboard box technique being demonstrated by the late great Geoff Hamilton who presented Gardener’s World when I first fell in love with gardening. I remember marvelling at the hypertufa hack back then. 20 years later I finally gave it a try.
My chosen method was to give an old enamelled belfast sink a facelift using hypertufa, as I happened to have an old chipped one from a kitchen refurbishment. If you haven’t got one then look at online auction sites or in architectural salvage yards. Good quality ones can cost tens of pounds but you only need a chipped poor quality one and these you can get for under £20.
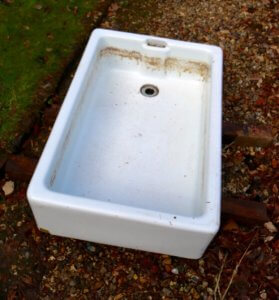
My old belfast sink – chipped and stained and ready for a facelift
What is hypertufa?
Hypertufa is a cement based mix named after tufa rock, a natural stone traditionally mined in Wales.
The three ingredients of hypertufa are:
- Cement
- Sharp sand
- Coir or other compost
That’s it.
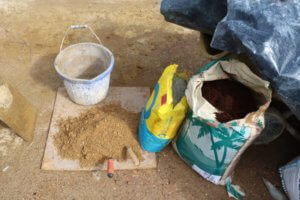
Hypertufa ingredients – cement, sharp sand and compost (here coco fibre compost)
I happen to be doing building works at the moment so all the ingredients were on hand but a large bag of each ingredient would cost you no more than £4 from a DIY store. £12 for all the ingredients and you’ll have plenty to spare.
Preparing your sink
Put your sink up on a couple of planks or a pile of bricks so that you can work on it easily. If you can, move it to its final position as they are heavy to move, even heavier once the hypertufa is applied.
Usually made of white enamel, the sides of a belfast sink are shiny and therefore difficult to stick anything to. Preparation is therefore important. First, clean your sink as best you can with soapy water then dry thoroughly with a tea-towel.
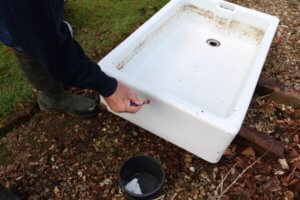
Apply the PVA glue to the clean sides of the sink using a paintbrush
The next step is to create a ridged non shiny surface. I used white craft glue, otherwise known as PVA glue, for this purpose. Apply it with a paintbrush and run the brush repeatedly backwards and forwards horizontally. This will create tiny ridges which will help to create the perfect surface for the mix to stick to. You could also try mixing some sand into the glue before applying to create an even better surface for the mix to stick to.
Cover the insides too but only to just beyond where you want you final soil level to be (say 5-7cm down).
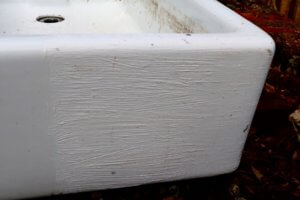
The glue creates tiny ridges to aid adhesion
Go and have a cup of tea and wait until the glue is drying but still a bit tacky. In hot dry weather this will take less time but on a damp, cold bank holiday weekend in England I waited an hour and a half.
Mix your Hypertufa
Admission time – to cover this sink I made the mixture in my builder’s cement mixer and did a bulk job that covered the whole sink.
However, it is very easy to do in smaller batches on a board, or in a bucket. There are various recipes out there and the Alpine Garden Society has mixtures that are supposed to look like various different stones.
I kept it simple and went for one part cement, one part sharp sand, one part coco (coir) compost. In my case I used a builder’s shovel – so one shovel cement, one shovel sand, one shovel of compost were my proportions.
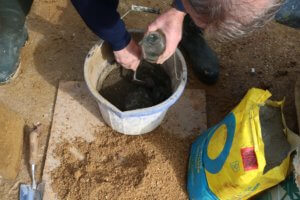
The ingredients can be mixed in a bucket – as here – or on a board or even in a cement mixer
Add enough water to make the mixture wet but not sloppy. A sloppy mix will slide off, along with the smile from your face. Think the kind of consistency of a good mud pie from childhood and you’ll have the perfect mix – malleable enough to shape – and to hold its shape. I used 5 shovels of each ingredient to cover my whole sink (90cm X 60cm).
Applying the hypertufa
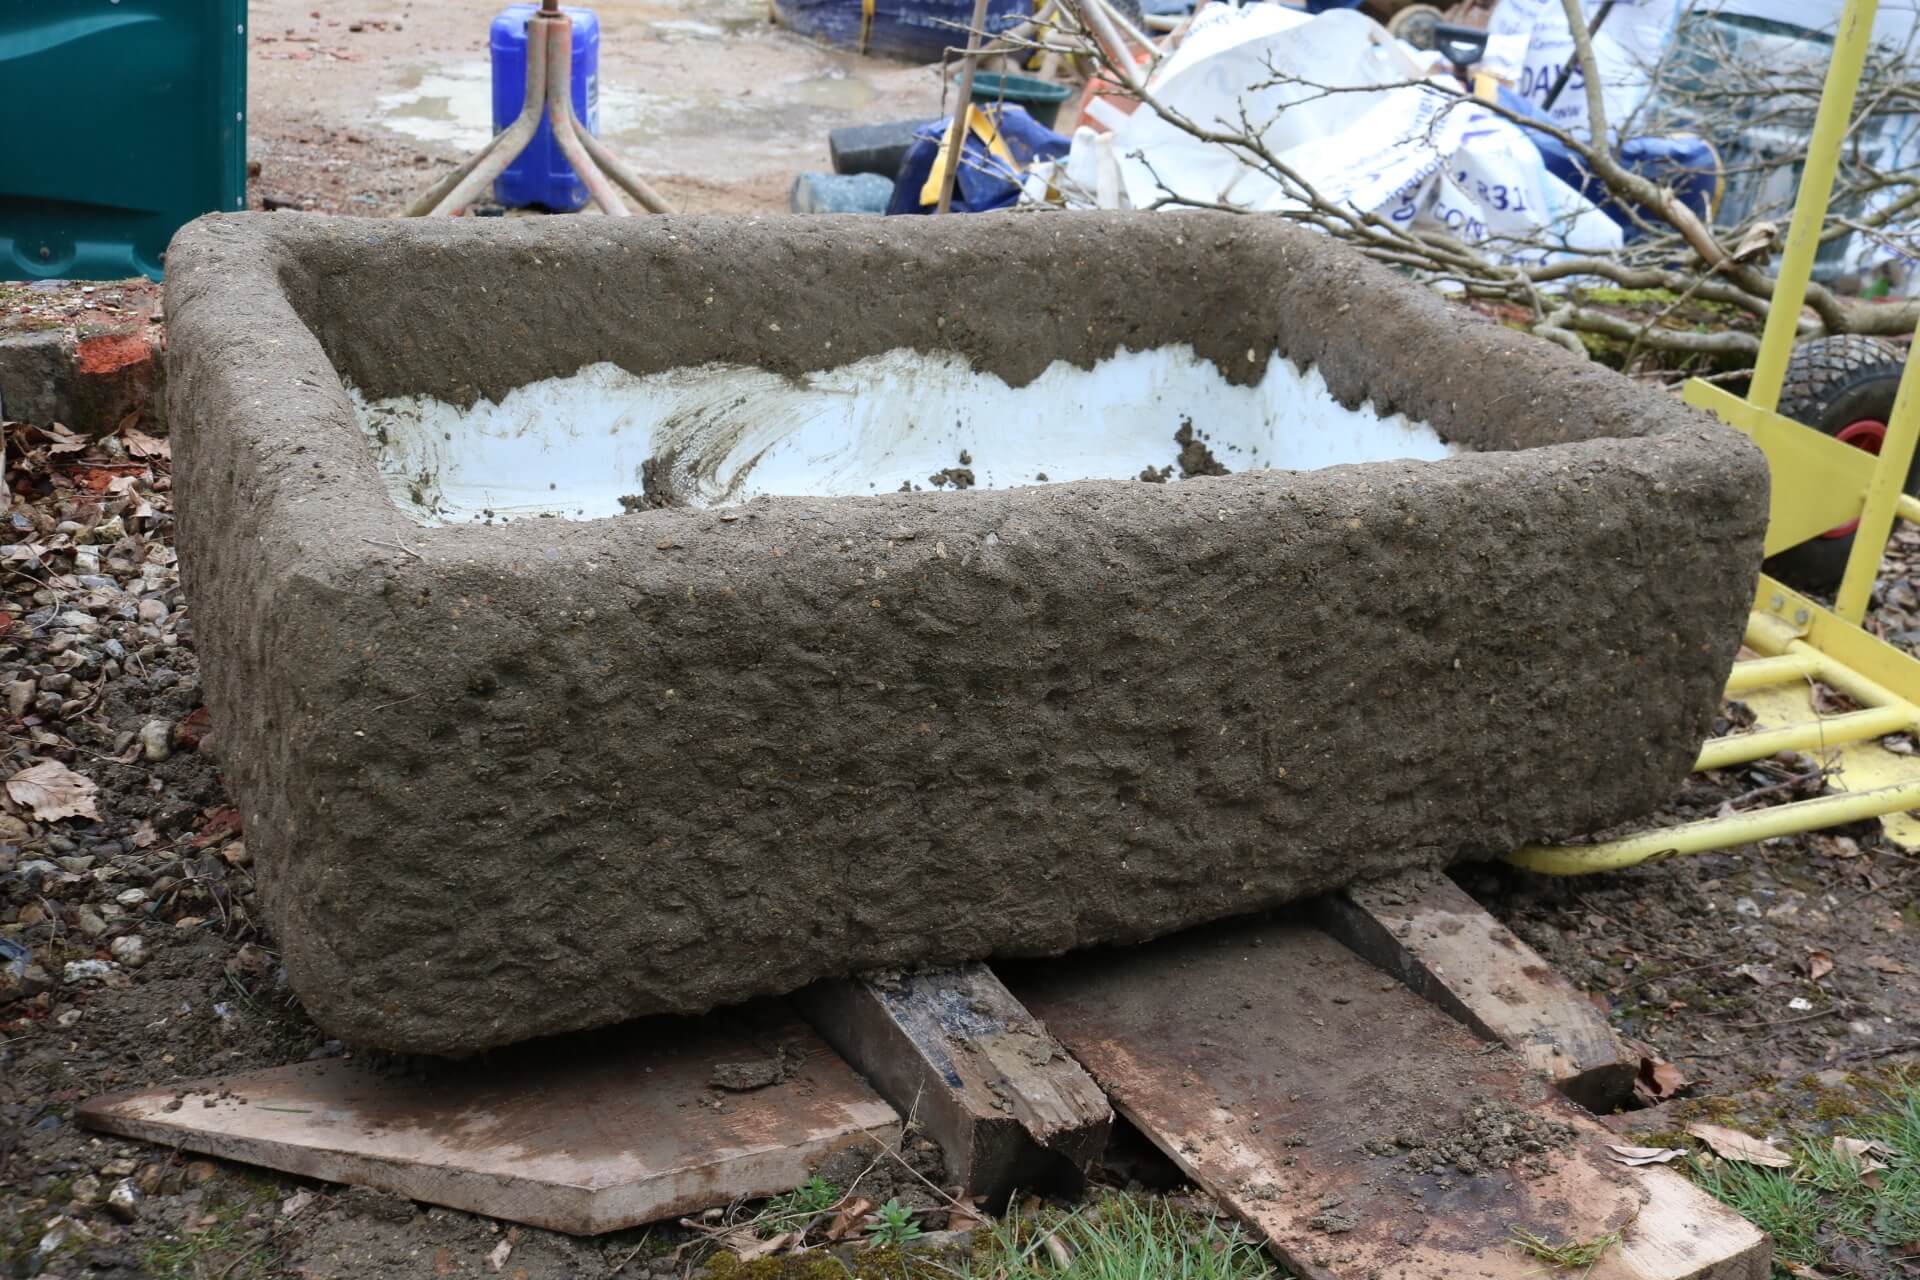
I’ve read various methods which say start at the bottom, or start at the top but I just went for it and started randomly in the middle. I started with a trowel but I admit I found it easier to put it on with my hands. If you do this, wear rubber gloves as cement is corrosive.
Gently press the mix onto the sides of the sink, over the rim at the top and down the insides of the sink. Using both hands it’s easy to mould the hypertufa over the sides, over the top and under the base to make sure that all the white enamel is covered. I covered the whole sink, with the help of my father-in-law in just under an hour.
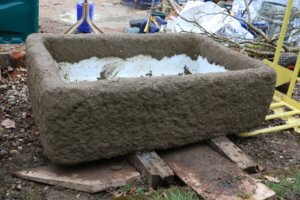
You don’t want perfectly even coverage as very few natural stone troughs are uniform. I chose to create a stipple effect with my fingers as I went along. This achieves the hewn look that chisels make and will create the environment for mosses to take hold.
Drying and finishing
Depending on the weather, the trough should have set fully within two days. Check it after a few hours to see how it’s doing as you can still shape it a bit and improve the finish by rubbing it with a bit of damp hessian, or a brush. You can choose to add a stippled finish at this point too or you could add diagonal lines to look like a stonemason’s chisel marks.
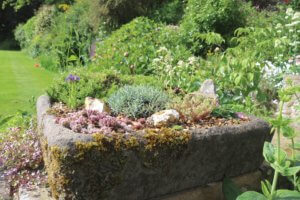
I moved my trough into its position by my new greenhouse in May 2018 and planted it up with some easy to grow alpines in June. If you want to read about how to plant up a trough and what plants I chose click here.
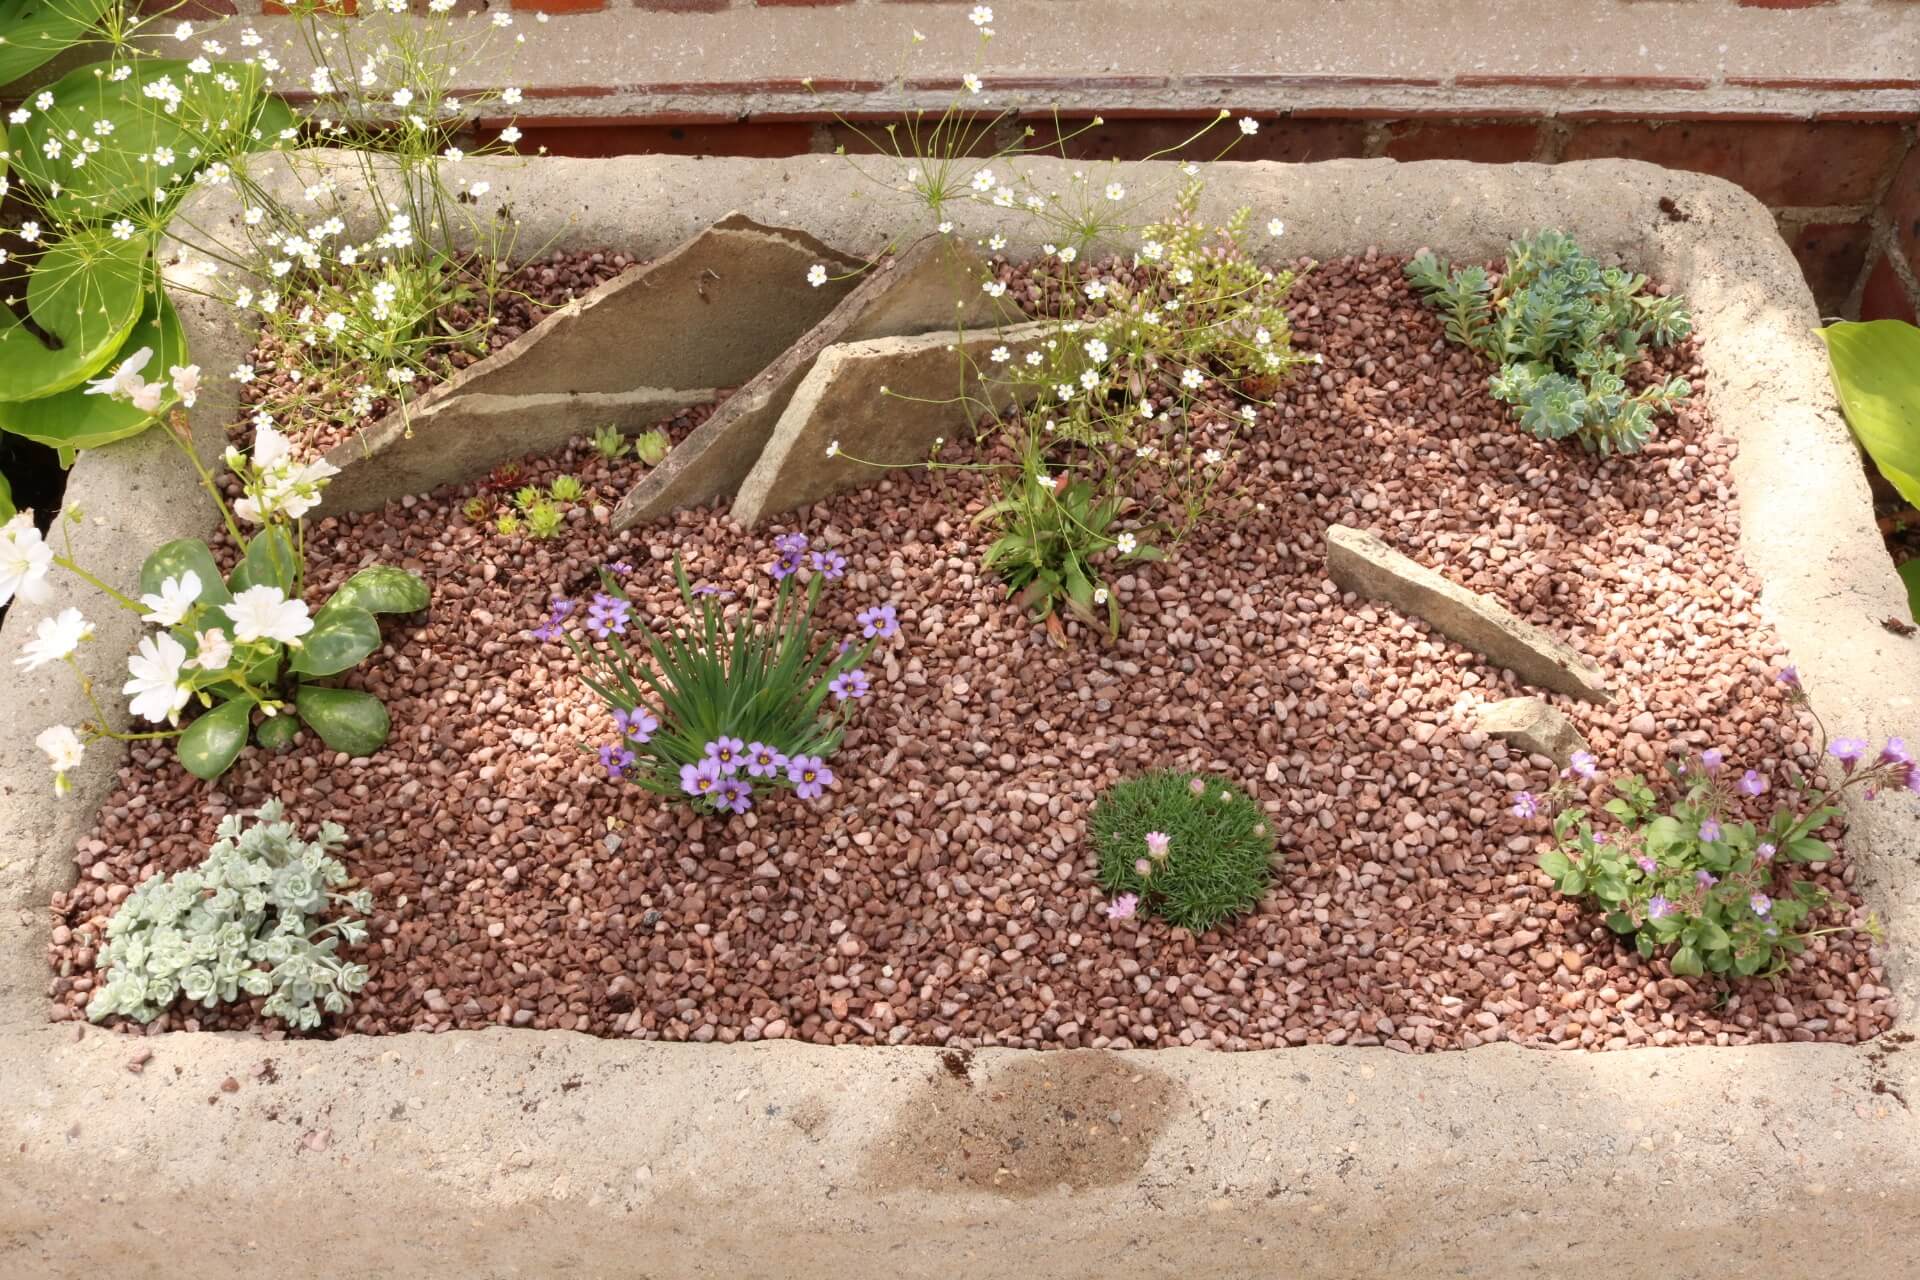
Trough planted up with pretty, easy to grow alpines


Okay, this is just very cool! Thanks for sharing/teaching! From Chuck in Colorado
Thanks Chuck – It was excellent fun and really so easy. I was going to write it up after I’d done the planting but your thirst for knowledge got me to write it sooner. Let me know if you give it a go.
Wow its sounds super easy. I’ve just bought two old belfast sinks from salvage yard, so can’t wait to get started.
Lovely to hear from you Margaret. I’m not great at DIY but yes this was very easy and very successful. Best of luck with your sinks and please get in touch to let me know how it goes.
I’m excited to see what you have done with the old Belfast sink, I have one old scrapped sink for years and didn’t know what to do with it.
Will certainly be trying this out. Thank you very much.
Hi Mary – So lovely to hear from you and I really would recommend giving this a go. I’m not massively practical but found this easy – and fun!
Thank you for sharing this idea, i have 2 Belfast sinks and i want them near my kitchen door to grow herbs in
I hope you do give it a go – herbs would be a great idea for a trough like this.
I made one of these years ago but sadly had to leave it behind when I moved. It got better over time. I have inherited a ceramic shower tray in the garden of my new house, so I am going to see how it looks in that. Can’t wait to get in there and make some mud pie mixture!!
A shower tray – what a great idea! Enjoy it and let me know how you get on.
Great blog. I may give this a try I wonder if wallpaper paste will work?
Hi Paul – do you mean instead of the PVA glue? I think wallpaper paste probably would work. It just needs to dry to a tacky ridged surface.
Hi I have a chipped Belfast sink and an old Victorian water pump, I wanted to circulate water through the two of them, as the sink will be full of water will this be ok. Will this work on a galvernised trough.
Regards Colin.
I think it will work on a galvanised trough. As long as you can rough the surface up beforehand, maybe using the PVA glue idea. I’m not 100% sure about running water through these as a pond feature but they certainly are weather proof in the UK no matter how much rain is thrown at them they never soften so I’m guessing it’ll be OK. But it’s only a guess. Good luck!
Hi Colin, did your water feature succeed using the Hypertufa covering? I have an old sink I want to turn into a mini pond but I don’t want it to look like a sink!
I am just having to replace the hypertufa on my Belfast sink it must have been on 30 years, so owes me nothing. I went mad at the time and made small trough with cardboard boxes,filled a pair of wellingtons and put flower pots in top so when they had dried I took them out and had somewhere for plants also a toad stool all still going strong. Give it a go.
The toadstool sounds brilliant. You certainly got allot out of your hypertufa and I’m with you – everyone should give it a go.
Excited to start this project as I am (similar to Colin) going to make a water feature. Thanks for the idea
Gerri – good luck. It’s great to have an exciting project like this. Let me know how it goes.
Hi Gerri, did your water feature succeed using the Hypertufa covering? I have an old sink I want to turn into a mini pond but I don’t want it to look like a sink!
Thanks for this. We’ve just finished and our old sink is looking fab.
So pleased to hear that Geoff – I’m sure it’ll bring you so much joy over the years. Now to plant it up!
Hi, I want to make a small water feature using hypertufa on a belfast sink. You said only put the hypertufa up to where the soil level will be. What if I put hypertufa all over and have water in the hypertufa sink? The alpine society doc says fine, the hypertufa can be porous as a garden pot would be, but the belfast sink is impermeable. What advice? thanks, Philippa
Hi Philippa – what a great sounding project. Obviously I’ve not actually tried this but if you’ve tested the belfast sink and made sure it’s watertight with plug in then I can’t see why this wouldn’t work well. Keep me informed!
Hi Philippa, did your water feature succeed using the Hypertufa covering? I have an old sink I want to turn into a mini pond but I don’t want it to look like a sink!
Great instructions, so easy to make and apply. It’s hard to believe that my two very badly chipped and horrible Belfast sinks could come out so beautiful! Thank you!!!
Hi Kay – that’s so great! I’m very pleased to hear the method worked so well for you. Now for the really fun part – planting them up.
Thank you so much for sharing this, Chuck! I’ve had a butler sink for about 12 years now, determined that one day I’ll do something with it. Your post has totally inspired me! The dimensions are the same as your sink and you give the exact proportions of mix…you’re a star!
Your ‘stone’ sink looks fantastic .
Good luck Vassa – I’m sure you’ll do a great job and have a lovely sink for your garden.
Hello again…sorry Katherine, I got your name wrong and called you Chuck!!
Sorry…🥴
HI
A friend made one up and has given us a belfast sink he didn’t want so we are all stations go to get it done. He said to use chicken wire after pva to help the cement stick. His looks great.
Starting tomorrow we are giving it our all!!!